Wednesday, September 7, 2011

An Experiment in Canning Dog Food

Smokey cracks me up... he rests his chin on the bottom shelf of the coffee table while he
observes the action in the kitchen.

When I buy a whole chicken to use in making chicken salad or chicken and dumplings, I have, in the past, simply thrown out the little "bag" of "innards"... we don't eat necks, gizzards, hearts and livers. I got to thinking about this waste, and seeing as we have a new canine member of the family (our 7 year old rescue German Shepherd, Smokey), I started reading up on the nutritional needs of the dog... it seems most (if not all) commercial dog foods contain a LOT more filler ingredients than is really healthy for dogs.

Now, I'm NOT fanatic about this, our Smokey still eats his store-bought kibble and commercially canned dog food... but after my reading, I thought instead of throwing out chicken parts and the skin and bits I have left after cooking a chicken, I'd save it up and try my hand at a balanced, canned dog food of my own.

I learned from my research that a dog's digestive system is shorter than humans and has different needs... they don't need to eat just like we do. Here's the basic "formula" I came up with...

Protein... a dog should have at least half (preferably more) animal proteins... such as muscle meat, heart, liver, kidney, eggs, dairy (e.g. yogurt, kefir, cottage cheese), fish (like salmon, mackerel, sardines)

Carbohydrates... dogs really have no nutritional need for carbohydrates, they are added as filler and additional calories (no more than half should include carbohydrates, preferably much less).

Fat... Unlike humans, dogs have no cholesterol issues and need fats in their diets to keep their joints lubricated. Fats also provide palatability of food, and are needed for even-tempered energy levels, healthy skin and coat, digestion, and a stable body temperature. Fats are an important part of a dog's diet... and should comprise 15-20% of their food.

Fruits and Veggies... Can be fed in fairly small amounts to add variety and vitamins.

Calcium... Necessary for bone and tooth health.

Now... after saying all that... here's what I did to mix up my first dog food concoction...


I cooked up all my saved chicken parts... livers, hearts, gizzards, muscle meat bits, skins, etc. I ended up with about 3 cups of chicken parts.


To this I added 2 cups of cooked rice (rice is a fairly easily digested grain for canines)


2 cooked carrots... for flavor and vitamins


Next I added a whole boiled egg for and additional bit of protein and fat... with the shell left on for calcium


I ran this mixture through my meat grinder attachment (coarse grind blade) to my KitchenAid mixer... it was pretty gross looking but honestly smelled delicious... DH kept coming in and asking what I was cooking that smelled so good... "Dog Food" I replied... "Oh." I think he was disappointed!


After all the grinding, the mixture looked like this...

Appetizing huh?

In a saucepan with the meat mixture... I added a few more ingredients...


2 Tablespoons apple cider vinegar (good for joint health, our middle-aged pooch is already getting a little stiff in the leg joints, the cider helps)


One Tablespoon of garlic powder (helps guard against fleas and ticks)


2 cups of chicken broth (the liquid from cooking all those chicken parts)... for added flavor, fat, and to help get the consistency desired


I heated the mixture up and began ladling it into my prepared pint jars (heat jars, lids, and rings in boiling water, keeping hot until time to use them)


I got rid of any air bubbles...
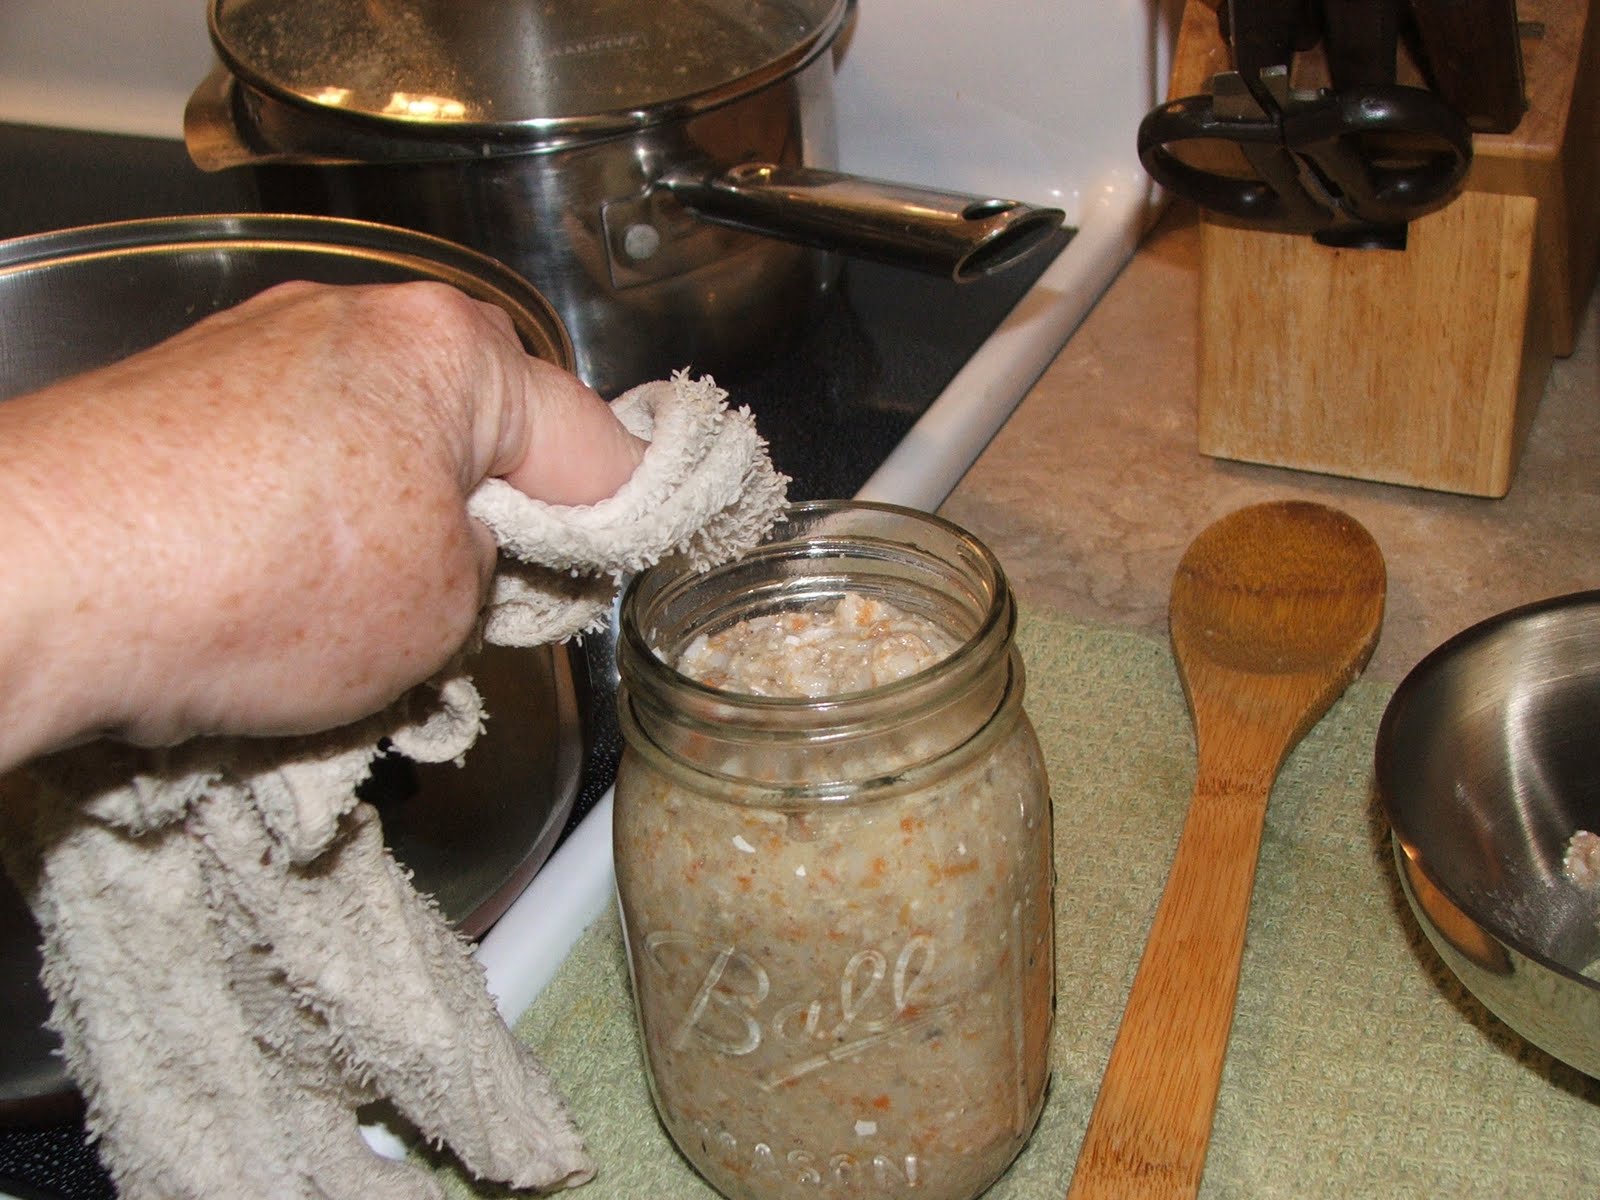

Wiped the jar rims, and tightened the lids on to fingertip tightness...


I processed the jars in my pressure canner (follow directions that come with your own brand of pressure canner)


... at 10 pounds of pressure for 70 minutes...

After the process was complete, I removed the canner from the heat and let the pressure drop to ZERO before removing the lid and taking out the jars...


... and setting them on a folded dish towel on the counter to wait for the PING of each successfully sealed jar... of DOG FOOD!!!


I wonder if Smokey will savor the gourmet delight I cooked up just for him? or will he inhale it without even chewing like he does most other foods? I'm pretty sure I know the answer to that question!


Monday, September 5, 2011

Canning Red Onions in Vinegar


I got a huge bag of red onions at the farmers market... used them in salsa, several relishes, and in cooking... still had some left... 

I came across a simple recipe for red onions in vinegar and decided to use up the rest of my onions.

According to the recipe, "These onions rings are a perfect addition to fresh salads. Try adding them to a bed of romaine lettuce or spinach. Add strawberries and candied walnuts and dress with a mild vinaigrette." Well, that sounded yummy, I was sold! Plus they would look so pretty in the jars!

Here's what I did...

First I prepared my half pint canning jars by sterilizing them in boiling water. I simmered my lids and rings in water, keeping them hot until I was ready to use them.

In a large stainless steel saucepan, I combined...


4 cups red wine vinegar and 


1 clove garlic

I brought the mixture to a boil over medium-high heat, reduced the heat and boiled gently for 5 minutes until the garlic flavor infused the liquid. I added...

10 cups sliced, peeled red onions (1/4 inch thick rings)

...and increased the heat to medium-high and brought everything back to a boil, reduced heat again and boiled gently for another 5 minutes, until onions were heated through. I discarded the garlic clove.


I packed my half pint jars with the onion mixture, leaving a generous half inch headspace and removing any air bubbles. I wiped the rims and tightened the lids on to a fingertip tightness.


I processed my jars of onions in a boiling water bath... place jars in canner, ensuring they are completely covered with water. Bring to a boil and process for 10 minutes.

After processing, I removed the jars from the canner using my jar lifter, and set them on a folded dish towel on the counter to cool... and to listen for the PING of each successfully sealed jar!

In real life, the jars are NOT this blurry ;-) but the color is beautiful!


Saturday, September 3, 2011

Canning Plum Preserves


Jelly, Jam, Preserves... jelly is made from fruit juices with added sugar and pectin... jam is made with the whole fruit and juice with sugar and pectin added... preserves use no pectin, and is made using whole fruit with sugar added... and cooked until thick and syrupy.

Using some of the plums I got, I decided to make plum preserves... a simple, delicious use for this sweet, fruity concoction is to spoon it over cheesecake for a "quick show-stopping dessert." And, as always, it's great with butter on toast!

Here's what I did...

I prepared my jars and lids... I placed my pint jars in a flat pan of water over two stove eyes and brought it to a boil, keeping the jars hot until I was ready for them.


I simmered my lids and rings and kept them hot.


I halved and pitted five cups of plums (I used red plums)

In a large, deep, stainless steel saucepan, I combined the plums,
4 cups of granulated sugar,
and
1 cup of water

I brought the mixture to a boil over medium heat, stirring to dissolve the sugar. Once everything was dissolved, I turned the heat to high and boiled hard until the mixture thickened.


I removed it from the heat to test gel.

This can be done by bringing the mixture to 220 degrees F., testing with a candy thermometer...


... or by using the "sheet test"... dip a cold metal spoon into the boiling soft spread. Lift the spoon and hold it horizontally and edge down so the syrup runs off the edge. As the mixture cooks, the drops with become heavier and will drop off the spoon separately but two at a time... when the two drops join together and "sheet" off the spoon, the gel stage has been reached.

When gel stage was reached, I skimmed off any foam...


... and ladled the mixture into hot pint jars, leaving 1/4 inch headspace. I removed air bubbles and adjusted headspace, if necessary, by adding hot preserves. I wiped the rim and tightened the lids on to fingertip tightness.

I placed the jars in my canner making sure they were completely covered with water... I processed the preserves using the boiling water method... bringing the water in the canner to a boil and processing for 15 minutes. I removed the jars using my jar lifter and set them on a folded dish towel on the counter to cool... and, of course, to listen for the PING of each successfully sealed jar.

Plum Preserves... so pretty in the jars!

This recipe will make about 3 pints or 5-6 half pints (I doubled it!)

Canning Granny©2011 All Rights Reserved


Thursday, September 1, 2011

September and Mama


This post is NOT about canning, but about the wonderful woman who taught me how... my sweet Mama! Mama has been gone, taken earlier in life than I thought she should have been, for three years now, but the missing has not eased up much.

Mama's favorite time of year was fall... and she carried on a tradition with us kids that her own Mama had begun years before... every September 1st for as long as I can remember, Mama (and her Mama before her) recited the poem, "September" to us... when we were teenagers, we would roll our eyes and giggle, but she said it anyway... and we listened, and in spite of ourselves we memorized it too, and learned to love it. When we grew up and moved away from home, she called each of us four children and each of her four siblings, and later the grandchildren... every September 1 and recited it for us.

I missed her call three years ago and she left the recitation on my voice mail... my DH being the "tech guru" that he is, was able to save that voice mail and save it as a recording which I have stored on my computer. I have yet to listen to it again... I'm not ready... you see, Mama died unexpectedly two weeks after that last September 1 recitation. I returned her call that September 1st three years ago, and we had the best conversation we had had in awhile. We laughed and talked and asked about each other's day and shared the latest gossip... that was the very last time I talked to Mama, and a wonderful memory. Some day I will be able to listen to the recorded message again... but not today.

Happy September 1... and may I share Mama's tradition?

September

The goldenrod is yellow,
The corn is turning brown,
The trees in the apple orchard,
With fruit are bending down.

The gentian's bluest fringes,
Are curling in the sun,
In dusty pods, the milkweed,
Its hidden silk has spun.

The sedges flaunt their harvest,
In every meadow nook.
And asters by the brookside,
Make asters in the brook.

In dewy lanes at morning,
The grapes sweet odors rise,
At noon the roads all flutter
With yellow butterflies.

By all these lovely tokens,
September days are here.
With summer's best of weather,
And autumn's best of cheer.

I miss you Mama!

Sunday, August 28, 2011

Canning Plum Sauce


I got some beautiful red plums at the farmers market... what to do with them? 

I love fruit and I love to make jams, jellies, and preserves, but in all honesty, we don't eat that much of it... we tend to have more than we need most of the time. Now if you're talking my brother's peach preserves, that's a different story... I can eat that stuff with a spoon, no bread needed! But as a rule, jams and jellies last awhile at our house... I give a lot away as gifts.

So... imagine my delight when I happened upon a recipe for plum sauce... using fruit... my beautiful plums... and it's not jam! Yay!

This sweet and spicy sauce is wonderful with Asian style foods, chicken... and is wonderful with pork dishes... I've cooked pork tenderloin and chops... slow cooking in the oven in my covered terra cotta cooker (that I got at a yard sale for $3, yay me!) and it's fabulous! I've used it as a dipping sauce for everything from prosciutto wrapped figs to chicken nuggets.

Here's how I made this delicious, versatile sauce...

In a large, stainless steel saucepan I combined...

2 cups lightly packed brown sugar
3/4 cup chopped onion (I used red onions because I had them on hand, use whatever you like)


2 Tbsp. finely chopped seeded green chili pepper (I made two batches... in one batch I used jalapenos, in another, the small chili peppers... they're both great, use peppers with the "hotness" you like)


1 Tbsp. salt (I used canning/pickling salt)
2 cloves garlic, finely chopped
1 Tbsp. gingerroot, finely chopped (I had some crystallized ginger on hand, used it with great results)

I brought the mixture to a boil over high heat, stirring constantly.


I added 10 cups chopped, pitted plums...


And returned to a boil. I then reduced the heat and boiled gently, stirring occasionally, until thick and syrupy... took between and hour and a half and two hours.


While my sauce was simmering and thickening, I prepared my half pint canning jars by heating them in a pan of boiling water. I simmered my lids and rings in boiling water and kept everything hot until my sauce was ready.


I ladled my hot sauce into the jars leaving about a half inch headspace, removed any air bubbles and adjusted headspace as needed. I wiped the rims and tightened the lids on to fingertip tightness.


I processed the jars in a boiling water bath... placing the jars in the canner ensuring they are completely covered with water... brought to a boil and processed for 20 minutes.

I removed the jars from the canner after processing using my jar lifter... set them on a folded dish towel on the counter to cool and to listen for the PING of each successfully sealed jar.

*Remember... wear rubber gloves while seeding and chopping hot peppers or you WILL burn your hands! The best way to seed peppers is to trim off the stem end and then cut the pepper in half lengthwise. Scrape out the seeds and veins using a spoon.

Canning Granny©2011 All Rights Reserved


html, body, div, span, applet, object, iframe, h1, h2, h3, h4, h5, h6, p, blockquote, pre, a, abbr, acronym, address, big, cite, code, del, dfn, em, font, img, ins, kbd, q, s, samp, small, strike, strong, sub, sup, tt, var, b, u, i, center, dl, dt, dd, ol, ul, li, fieldset, form, label, legend, table, caption, tbody, tfoot, thead, tr, th, td { margin: 0; padding: 0; border: 0; outline: 0; font-size: 100%; vertical-align: baseline; background: transparent; } body { line-height: 1; } ol, ul { list-style: none; } blockquote, q { quotes: none; } /* remember to define focus styles! */ :focus { outline: 0; } /* remember to highlight inserts somehow! */ ins { text-decoration: none; } del { text-decoration: line-through; } /* tables still need 'cellspacing="0"' in the markup */ table { border-collapse: collapse; border-spacing: 0; }