Tuesday, April 26, 2011

Canning Strawberries in Syrup

Tip: Select firm, ripe, red berries that don't have any white
flesh or hollow centers.

I love produce stands! Every chance I get, I stop in and browse the tables filled with fresh fruits and vegetables... makes me feel like I'm doing a little more than simply shopping... maybe it goes back to the days when women had to forage for food in the woods and fields, picking up tidbits of deliciousness here and there... anyhow I love produce stands!

Stopped in at the produce stand near my house recently and as I "foraged" around, picking up a tomato here, some summer squash there, I was drawn to the table filled with fresh, locally grown strawberries... they were beautiful, juicy, bright red and ripe... had to have some!

I'm not a big jam and jelly eater, my brother makes a lot and gives us all we need each year at Christmas, so I didn't want to make jam with my strawberries... thoughts swirled through my mind of ice cream topped with strawberries, pound cake or angel food cake with strawberries and whipped cream, and waffles with strawberries.

I got out my trusty Ball Complete Book of Home Preserving and settled on canning Strawberries in Syrup, simple yumminess!

The recipe called for 16 cups of strawberries and 2-3 cups of granulated sugar... how easy was that?

I hulled and sliced my strawberries into a bowl and sprinkled the sugar over them... then set them aside for a few hours.

When my strawberries had dissolved most of the sugar and poured out their glistening ruby-colored juice, I was ready to can them.

I heated my pint canning jars in a pan of water on the stove, placing a dish towel in the bottom of the pan so the jars wouldn't tip over. I simmered my lids and rings in a pot of water for 10-15 minutes and kept them hot until I was ready for them.


I then transferred my strawberries to a saucepan and heated them over medium-low heat, stirring occasionally until all the sugar was dissolved and the strawberries were heated through.


I ladled the hot strawberries and liquid into my hot jars using my canning funnel, leaving 1/2 inch of headspace. I wiped the jar rims with a damp cloth and, using my magnetic wand gadget, removed the lids from the simmering water, tightening the lids on to a finger-tightness.


I processed the strawberries in a boiling water bath, placing the jars in the canner and covering them with water. 


I brought the water to a boil, put a lid on the canner, and processed the pint jars for 10 minutes. (Quarts would be processed for 15 minutes). Then I removed the hot jars using my jar lifter and set them on a folded dish towel on the counter to cool.

I love the sound of the Ping! of a successfully sealed jar!

Strawberry shortcake anyone?

Leave the jars undisturbed after they seal, for 12 to 24 hours
to make sure they stay sealed, then label and store
in a cool, dark place.

Canning Granny©2011 All Rights Reserved


Monday, April 25, 2011

Canning Brunswick Stew

We recently took a vacation trip to St. Simons Island, Georgia where we visited James Gould's (Mr. Gould "Dear" of Eugenia Price's Lighthouse trilogy fame) lighthouse and attended Christ Church where the history of the island is abundant inside the beautiful old church built by the Rev. Anson Green Phelps Dodge, and among the headstones in the cemetery underneath the beautiful live oaks draped with Spanish moss. At night we stayed just up the road and across the intracoastal waterway and Marshes of Glynn in the coastal town of Brunswick.


On our return, the Canning Granny in me was bound and determined to can up some Brunswick Stew in honor of our stay on the Golden Isles of southern Georgia.


The georgiaencyclopedia.org states that...

"Brunswick, Georgia, claims to be the place of origin for Brunswick stew. A twenty-five-gallon iron pot  
outside that coastal town bears a plaque declaring it to be the vessel in which this favorite southern
food was first cooked in 1898. In truth, the one-pot meal is credited to a number of places with Brunswick in
their names, but the honor (so far as the name is concerned) must go to Brunswick County,
Virginia. There, according to an entrenched local tradition supported by a 1988 Virginia General Assembly
proclamation, Jimmy Matthews, an African American hunting-camp cook, concocted a squirrel stew for his
master, Creed Haskins, in 1828, the stew being named for its home county.


As Georgia humorist Roy Blount Jr. quipped, 'Brunswick stew is what 
happens when small mammals carrying ears of corn 
fall into barbeque pits.'"


The recipe I chose to use for my stew is Spanky's Seafod Grill and Bar's 
World Famous Brunswick Stew, a recipe with several steps...
I started with the sauce
In a 2 quart sauce pan, over low heat, melt ¼ cup of butter then add:
1¾ cups Catsup
¼ cup Yellow Mustard
¼ cup white vinegar

Blend until smooth, then add:
½ tablespoon chopped garlic
1 teaspoon coarse ground black pepper
½ teaspoon crushed red pepper
½ oz. Liquid Smoke
1 oz. Worcestershire Sauce
1 oz. Crystal Hot Sauce or ½ oz. Tabasco
(I used Crystal Hot Sauce, very tasty!)
½ tablespoon fresh lemon juice

Blend until smooth, then add:
¼ cup dark brown sugar
Stir constantly, increase heat to simmer (DO NOT BOIL) for approx. 
10 minutes.
Makes approx. 3½ cups of sauce (set aside - to be added later).

DH decided the sauce would make a great BBQ sauce...
might mix some up
later and can it by itself for
basting chicken on the grill and such.
Now for the stew part of this yummy concoction...


In a 2 gallon pot, over low heat melt ¼ lb of butter then add:
3 cups small diced potatoes
1 cup small diced onion
2  14½ oz. cans of chicken broth
1 lb baked chicken (white and dark)
8-10 oz. smoked pork

Bring to a rolling boil, stirring until potatoes are near done, then add:
1 8½ oz. can early peas
2   14½ oz. cans stewed tomatoes -
(chop tomatoes, add liquid to the stew pot)

The prepared sauce
1 16 oz. can of baby lima beans
¼ cup Liquid Smoke
1  14
½ oz. can creamed corn

Slow simmer for 2 hours


Here's where I strayed from the recipe a little since I planned on canning 
this Brunswick Stew...
I added the onions, broth, chicken and smoked pork, stewed tomatoes, 

prepared sauce, liquid smoke, and creamed corn, but waited to 
add the potatoes, peas, and lima beans until just before filling my 
canning jars... didn't want my veggies to cook all to mush since 
they would be pressure canned for 90 minutes...
I added them last, just heating them through before filling my jars. 

And since the recipe I was using claimed to make one gallon of stew, 
I decided to double the recipe so I would have a full run of seven 
quart jars of stew and some left over to eat for supper.

Some of the ingredients for Brunswick Stew


Roasted chicken ready for shredding and
adding to the stew pot
Adding ingredients to the stew pot
Chopping roasted chicken

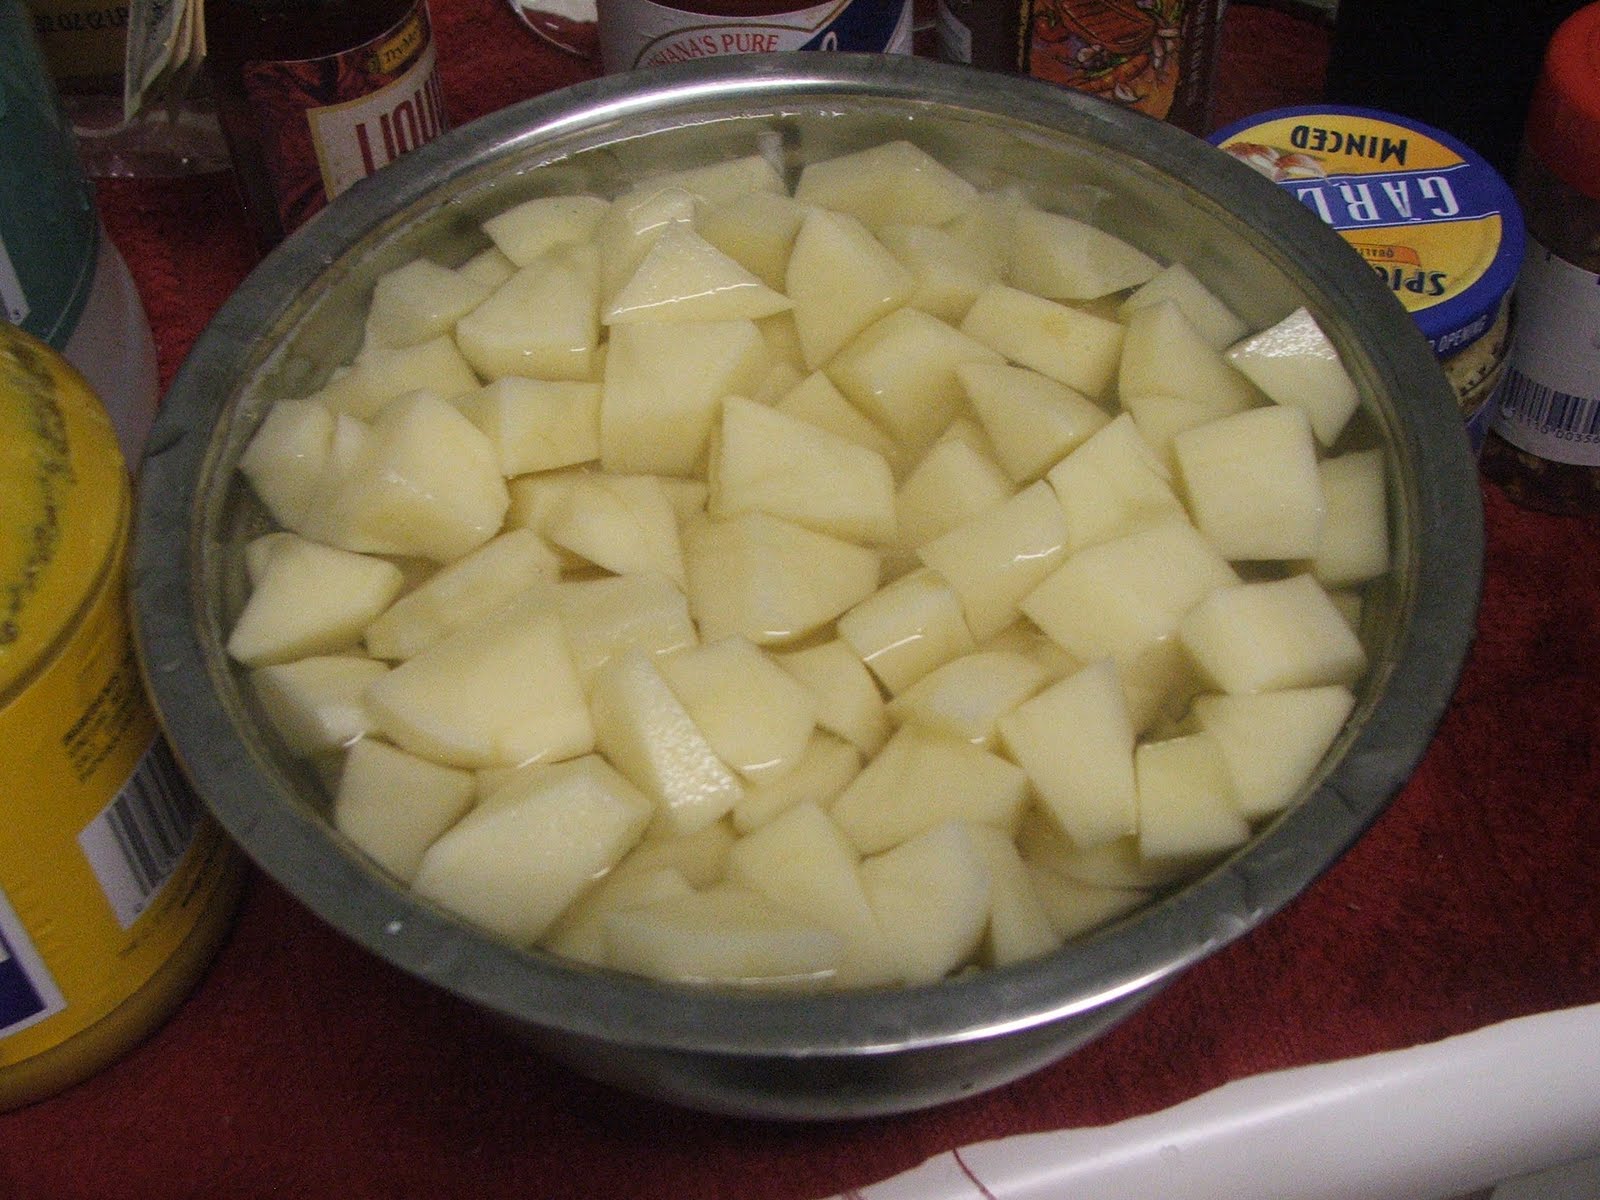
Potatoes diced and ready to add to the stew pot


I added the potatoes to the stew last so they wouldn't
turn to mush during the 90 minute canning process, just
letting them heat up without cooking through.
I sterilized my quart canning jars and simmered my lids and rings for 
10-15 minutes and kept them  hot till they were ready to use.


I filled the jars leaving an inch of headspace, then wiped the jar rims with a 
damp cloth to remove any dripped juice that might keep the lids from sealing. 
I removed the lids from the simmering water with a magnetic wand
(a handy gadget to have!) and tightened them onto the jars. Using my jar lifter
(because those jars are HOT!) I loaded them into the pressure canner for 

processing.

Following my canner's instruction book for the ingredient in the stew that 

takes the most time, I pressure canned the stew at
10 pounds of pressure for 90 minutes.

After allowing the pressure in the canner to drop to ZERO, I removed 

the canner lid and, once again using my handy dandy jar lifter,
I removed the jars from the canner and placed them on a
folded dish towel on the counter to cool.

The PING! sound of a successfully sealed jar is a 

beautiful sound indeed!


Check out this YouTube video DH and I made showing some of the 
steps to canning this delicious Brunswick Stew
http://youtu.be/bXqSBROJBew


Canning Granny©2011 All Rights Reserved


Saturday, April 16, 2011

Canning Cakes, Sweetbreads, Brownies and such

Yep! I canned cake! And brownies!

I was told you can't do it, but I did anyway.

**Disclaimer** The USDA and the Ag Extension people say there is no proven method for safely canning cakes and sweetbreads. Grannies have been doing it for decades, maybe even centuries so this Granny decided to give it a try. And, in all honesty, cakes aren't technically canned... they're bottled, the difference being in canning you use a pressure canner or a boiling water bath... you don't use either when you can (or bottle) cakes. Having said that... try this at your own risk, I did!

The method is the same for any cake and you can't really can a cake that is decorated or anything like that... brownies work great, banana bread, zucchini bread would be good, pound cakes are ideal... my DH loves an apricot pound cake that his mom used to make and it has a glaze on it using powdered sugar and lemon juice... I even canned that one with great success.

Why would I want to can cake? Two reasons...

One... with food prices beginning to soar out of sight and possible shortages in the future, I'm convinced that one day (maybe soon) something as simple as cake will be too expensive to make or I won't be able to find the ingredients... who knows!?

Two... and this is a biggie... a full-sized pound cake is pretty big. When my kids were home (especially my son as a teenager who could eat a whole cake and drink a gallon of milk in one sitting... I kid you not, he's done it and stayed skinny as a rail the little stinker!) I had no problem getting a cake eaten before it went stale. Now with just DH and myself and the kids a few hours away so they don't drop by often, if we get a hankering for some homemade pound cake and bake one, a lot of the time half the cake goes to waste before we can eat it all. Canning in large mouth pint jars divides a full sized pound cake into 7 or 8 jars, making mini-cakes for us to enjoy when we want... a box of brownie mix will fill about 4 jars.

My own beloved Mama made a sour cream pound cake that was "to die for!" So that's the recipe and pictures I will share today. This is a delicious, moist pound cake that my youngest brother requested every year for his birthday and Mama made for many special occasions. Mama is no longer with us, she's been gone for going on three years and I miss her so much, she was more than my Mama, she was my dear friend. Her recipe for sour cream pound cake...

1/2 cup shortening
1/2 pound butter or margarine
8 oz. sour cream
3 cups sugar
5 eggs
1/2 cup milk
3 cups cake flour
1/2 tsp. baking powder
1/4 tsp. baking soda
2 tsp. lemon extract
1/2 tsp. vanilla extract

Sift together flour, baking powder, and soda. Cream shortening with butter, beat until very light, adding sugar gradually. Add eggs one at a time, beating after each. Blend in flour and milk. Add extracts. Fold in sour cream slowly.

Now here's where the "canning" part takes over... in the original recipe you grease and flour a tube pan and bake at 325 degrees for an hour and a half.

To can (or bottle) this yummy goodness of a cake, here's what I did...


First I mixed up my batter... I doubled the recipe and don't recommend it unless you have a REALLY big bowl, it was a challenge keeping all the batter in the bowl, won't be doing that again!


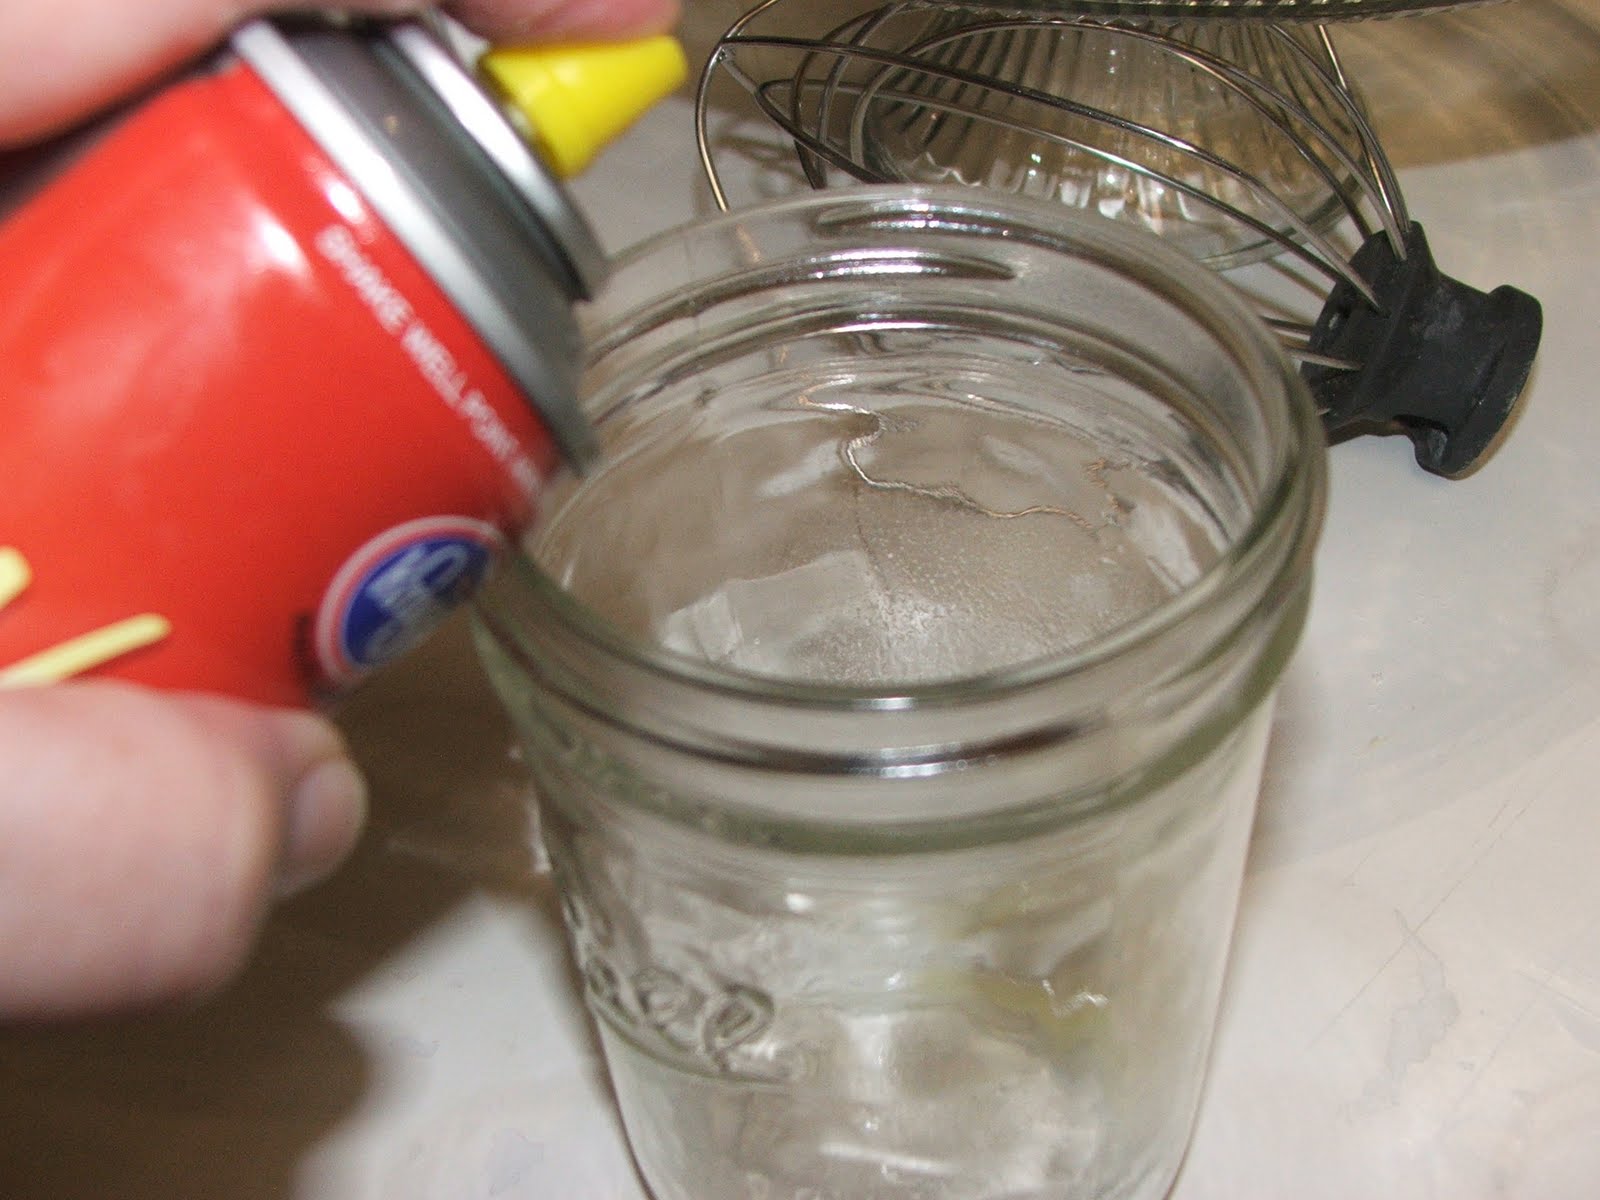
Next I sprayed the inside of my wide mouth pint jars with cooking spray. **I used wide mouth jars because they have straight sides, it would be pretty much impossible to get the cake out of a small mouth jar** I could have greased the inside of the jars with shortening or butter instead but cooking spray is easier and easy is a good thing sometimes. **DON'T flour the jars like you would a pan, it just doesn't work with this baking/canning combo.**


I filled the jar half way with the cake batter to allow room for it to rise. I wiped away any batter that might have dripped onto the rim with a damp cloth. Then I put the jars on a baking pan and slid them into my preheated 325 degree oven. I set the timer for an hour and a half, but checked on them after about an hour. They're done when a knife inserted into the center of the cake comes out clean. This batch of little cakes was done in about an hour and 15 minutes.


While the cake jars were baking, I brought my lids and rims to a boil in water and left them simmering so they'd stay hot until needed.


When my cakes were done and golden brown and smelling fabulous, I turned the oven off and opened the oven door, leaving the cakes sitting on the oven rack to stay warm while I took them out and sealed them one at a time.


If the cake had risen above the jar rim, I took a serrated knife and trimmed it down to the edge of the rim. **There's no need to be concerned about headspace with cakes**


I wiped the hot jars again with a damp cloth to remove any crumbs or baked on cake batter. **Care should be taken with this step, the jars are HOT!!!*


I removed the lids, one at a time with my trusty magnetic wand thingy (a FANTASTIC gadget for getting hot lids out of hot water). I gave the lid a little shake to remove as much water as possible, then I tightened them onto the jars.


I then set my sealed up jars of cake onto a folded dish towel on the counter and waited for that magical "Ping!" of a successfully sealed jar... it's a beautiful sound!


To enjoy this treat, just open up the jar, run a knife around the inside between the cake and the jar...


And slide it right out onto a plate.

Sour cream pound cake from a jar! Yum!
I'm told by some older "grannies" that these "canned cakes" will still be good when opened after months or even years... they probably won't get a chance to wait that long to be enjoyed around here!

Canning Granny©2011 All Rights Reserved


html, body, div, span, applet, object, iframe, h1, h2, h3, h4, h5, h6, p, blockquote, pre, a, abbr, acronym, address, big, cite, code, del, dfn, em, font, img, ins, kbd, q, s, samp, small, strike, strong, sub, sup, tt, var, b, u, i, center, dl, dt, dd, ol, ul, li, fieldset, form, label, legend, table, caption, tbody, tfoot, thead, tr, th, td { margin: 0; padding: 0; border: 0; outline: 0; font-size: 100%; vertical-align: baseline; background: transparent; } body { line-height: 1; } ol, ul { list-style: none; } blockquote, q { quotes: none; } /* remember to define focus styles! */ :focus { outline: 0; } /* remember to highlight inserts somehow! */ ins { text-decoration: none; } del { text-decoration: line-through; } /* tables still need 'cellspacing="0"' in the markup */ table { border-collapse: collapse; border-spacing: 0; }