
I started with the following recipe from simplyrecipes.com
Boston Brown Bread
Do your best to find the rye flour. It adds a lot to the flavor of the finished bread.
INGREDIENTS
- Butter for greasing loaf pans or coffee cans
- 1/2 cup (heaping) all-purpose flour
- 1/2 cup (heaping) rye flour
- 1/2 cup (heaping) finely ground corn meal (must be finely ground)
- 1/2 teaspoon baking powder
- 1/2 teaspoon baking soda
- 1/2 teaspoon salt
- 1/2 teaspoon allspice
- 1/2 cup molasses (any kind)
- 1 cup buttermilk
- 1 teaspoon vanilla extract (optional)
- 1/2 cup raisins (optional)
- One metal 6-inch tall by 4-inch diameter coffee can, or a 4x8 loaf pan
METHOD
1 You can either make this in the oven or the stovetop, and you can either make this with a loaf pan or a metal coffee can. If you are using the oven method, preheat the oven to 325° and bring a large pot of water to a boil. If you are using the stovetop method, set the steamer rack inside a tall stockpot and fill the pot with enough water to come 1/3 of the way up the sides of your coffee can. Turn the burner on to medium as you work.
2 Grease a coffee can or small loaf pan with butter. In a large bowl, mix the all-purpose flour, rye flour, corn meal, baking powder and soda, salt and allspice. Add the raisins if using.
3 In another bowl, mix together the buttermilk and vanilla extract if using. Whisk in the molasses. Pour the wet ingredients into the dry and stir well with a spoon.
4 Pour the batter into the coffee can or loaf pan taking care that the batter not reach higher than 2/3 up the sides of the container.
5 Cover the loaf pan or coffee can tightly with foil. If you are using the stovetop method, set the can in the pot, cover and turn the heat to high. If you are using the oven method, find a high-sided roasting pan that can hold the coffee can or loaf pan. Pour the boiling water into the roasting pan until it reaches one third up the side of the coffee can or loaf pan. Put the roasting pan into the oven. Steam the bread for at least 2 hours and 15 minutes. Check to see if the bread is done by inserting a toothpick into it. If the toothpick comes out clean, you're ready. If not, recover the pan and cook for up to another 45 minutes.
6 Remove from the oven and let cool for 10 minutes before putting on a rack. Let the bread cool for 1 hour before turning out of the container.
7 Slice and eat plain, or toast in a little butter in a frying pan.
Yield: Serves 4-6.
Here's what I did...

I began my "subversive" bread canning project by heating my wide mouth pint canning jars in the oven at 250 degrees for 20 minutes. I put enough water into my canner (or a large stockpot with a lid, used my canner because it's the only pot I have big enough) to cover the jars to about 1/3 of the way up the sides of the jars. I turned the heat on medium to get it going while I began mixing my batter.

I sprayed the insides of the jars with cooking spray (could have buttered them, but the spray was easier)

Next, I gathered my ingredients... I multiplied the original recipe by 4x so I could fill 8 pint canning jars.
I mixed all my dry ingredients in one large mixing bowl...

Then mixed all my liquid ingredients in another bowl (I chose NOT to add raisins)

I mixed the liquid ingredients into the dry ingredients

I filled each of the greased jars about 2/3 full of the bread batter (allowing space for the bread to rise)

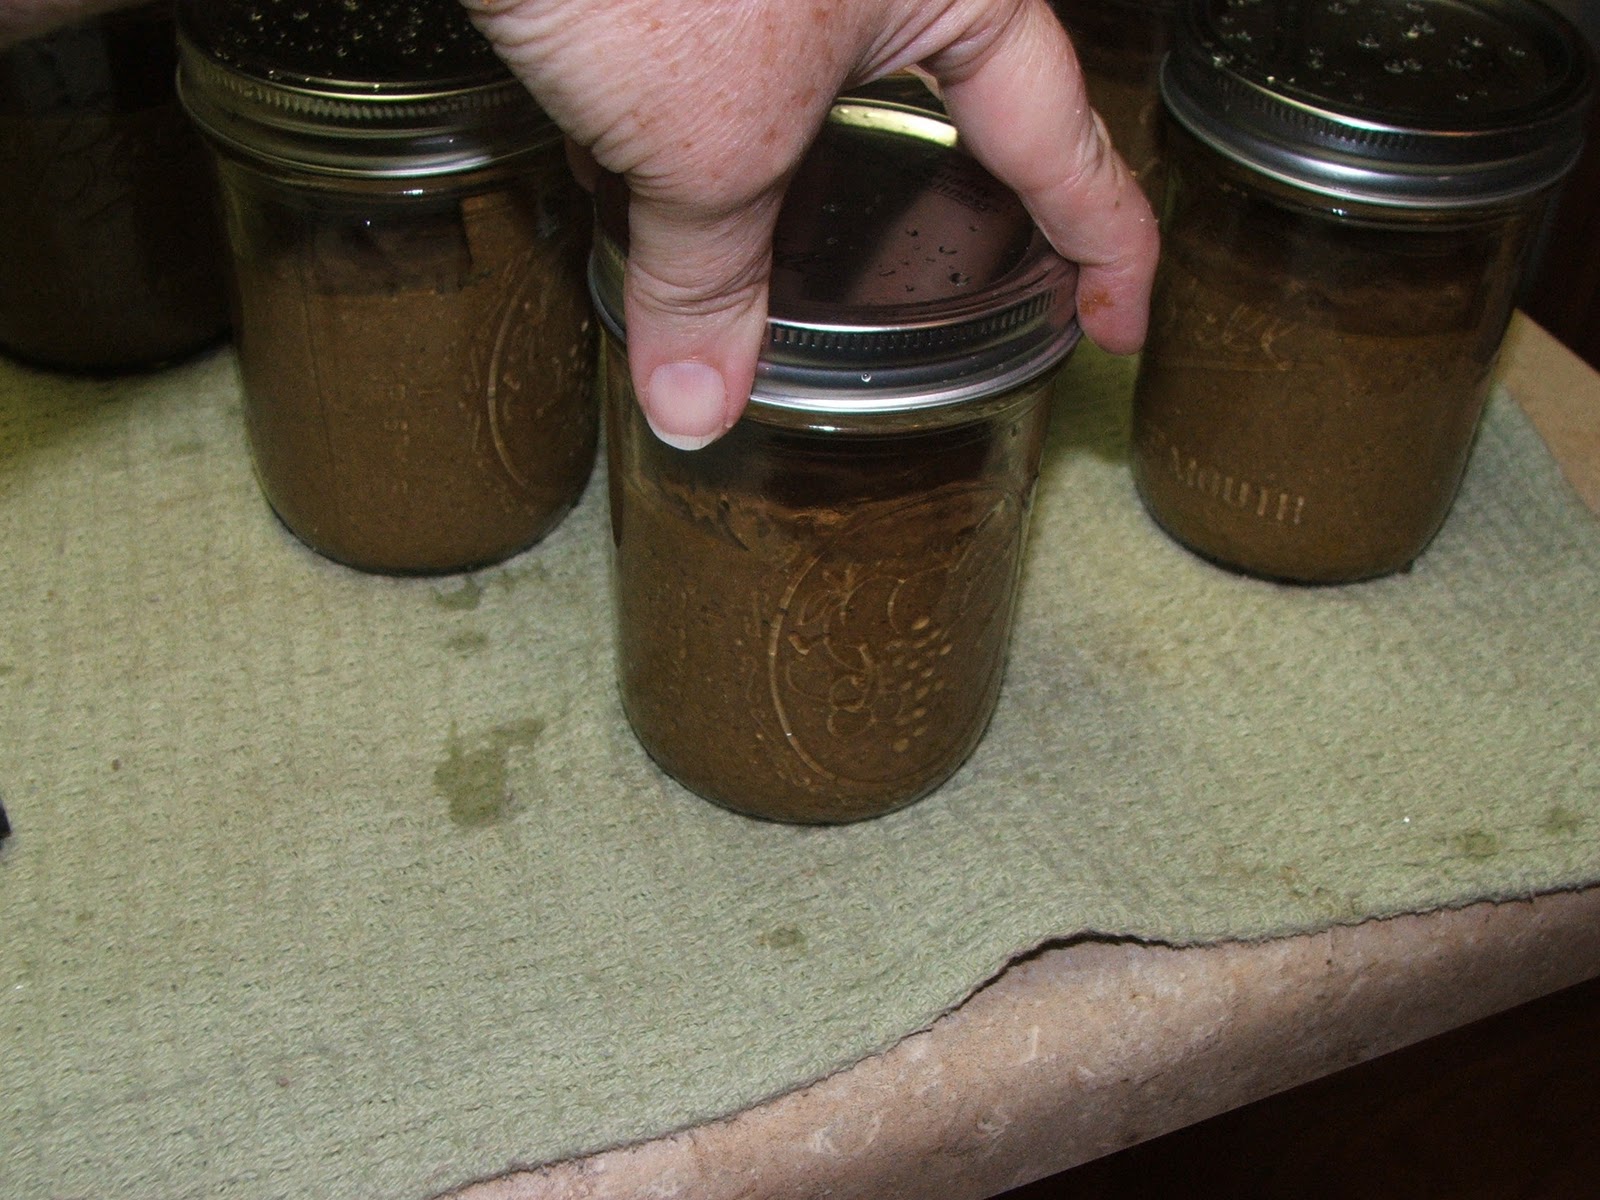
I took great care to wipe the jar rims to remove any excess batter and any oil from the cooking spray...
TIP: a little vinegar on the cloth helps to remove grease and oil.

After simmering my lids in boiling water, I tightened the lids onto the jars to a fingertip tightness.
I placed the jars of bread batter into the simmering water in the big pot (canner)

I placed the lid onto the canner loosely (don't tighten it down) and kept the water at a low boil (you might need to adjust the heat occasionally, but keep it at a low boil, this is a steamed bread). I steamed my bread for 2 hours and 15 minutes.

After steaming, I removed the jars of bread using my jar lifter, and set them on a folded dish towel on the counter to cool, and to seal... didn't take long before I began hearing that PING of the jars sealing.

Next morning, I HAD to test the delicious looking (and smelling) bread. I popped open a jar...

I ran a butter knife between the inside of the jar and the bread...

... and it slid right out onto the plate... looking very yummy and cute... a miniature loaf of Boston Brown Bread.

I sliced it up...

...and spread it with some real butter... and enjoyed it with my morning coffee! Delicious!
*As I previously stated, this is NOT an approved canning method. I sterilize EVERYTHING and take great care to assure I use the cleanest utensils, jars, lids, bowls, pots and pans I possibly can. I have eaten "canned cakes and breads" up to a year or more after "canning" with delicious, moist results... I cannot stress enough that this is NOT an approved method... I choose to do it because I feel I use AT LEAST as clean and sterile methods as commercial companies (probably more so) and I'm a bit of a Rebel Granny... if you have ANY doubts... don't do it!
Wonderful to see this, I've been thinking for a while about breads and cakes and wondering about the warnings and guidelines against, but some of the recipes look so good!! Thankyou!
ReplyDeleteSandra, Like I said before, I've had great results... but there are those pesky warnings! Don't want anyone to try without being aware! ~~Granny
DeleteThey could always freeze them once they have cooled if they were worried about shelf storage.
ReplyDeleteWouldn't you be able to tell if the bread was no good once you opened the jar in 6 months? Is it not approved because you could eat the bread and possibly not know it was bad and get sick? What is the hang up that FDA/USDA have?
ReplyDeleteThanks!
Allison
Allison, I personally think you WOULD be able to tell if it was bad when you opened it... however, the "powers that be" (FDA/USDA) claim that breads/cakes could contain invisible/un-smellable bacteria... I'm not saying they're wrong... I'm just saying I've never had any problems at all, and I've eaten canned cakes and breads for quite some time. ~~Granny
Deletehttp://extension.usu.edu/files/publications/factsheet/FN-FS_250_10.pdf
DeleteJust FYI, one can not smell botulism.
DeleteI cannot wait to try this! I'm looking forward to hearing from other bloggers and how their bread turned out! Thank you!
ReplyDeleteThank YOU Peggy... good luck with your bread! ~~Granny
DeleteGranny, do you boil all cakes or breads for the same amount of time? Do you only use dense cakes and breads? Thank you for your site. It is the best I have found. I have done the lemon and orange squash and your site is the only one I have ever seen it at (the orange wasn't so strong but I drank it anyway). I have been wanting to attempt cakes too but wanted to make sure I did it the right way learning from people who have done it for years.
ReplyDeleteI don't always boil the cakes... Boston Brown Bread is a steamed bread so it works for it... check out a previous post I did on cakes and breads, here's the link http://canninggranny.blogspot.com/2011/04/canning-cakes-sweetbreads-brownies-and.html
DeleteI have been baking pies and cakes in jars for over 10 years and have never had one go bad. I have had them up to a year in the pantry. They are the perfect gift to send to my son when he is out of country.
DeleteEnjoy
my grandmother used to make this bread all the time when i was a kid. I never got to watch her make that one and wish i had, but she would use the empty coffee and baked bean cans and then freeze it. I never realized it was steamed! I used to love it with cream cheese and haven't had it in more than 20 years...I learned so much from her about canning and self-reliant living. I just found your blog, but think I will be back for more!
ReplyDeleteThank you so much Jengi, for stopping by! I love hearing about memories others have. ~~Granny
DeleteThat bread looks so delicious! I'm pretty sure that it would get eaten pretty quickly anyway!
ReplyDeleteSo glad I found your blog!!
Margaret
Two in the Nest
Thank you Margaret for finding me too!
Deletefantastic issues altogether, you just won a {logo new|a new} reader. What might you suggest in regards to your publish that you simply made some days ago? Any positive?
ReplyDeleteOxypas Gwen Lightweight Nursing Shoe, color: White, size: 39
I made this yesterday, and it came out awful :( steamed it for 2 hrs 30 mins (we are at 4500 ft altitude), but it still came out of the jars sticky and yucky! I'm not blaming Granny, just wondering...any suggestions? My dh is from Boston, and will KNOW if it's not "right".
ReplyDeleteLisa in AZ
Oh Lisa, I hate that!! Mine turned out so yummy and perfect! The altitude could have something to do with it (I'm at about 600 ft)and I didn't put raisins in mine which would add to the moisture. I do know that with canning, you have to add 2-3 minutes per 1,000 ft. elevation when pressure canning because water boils at a higher temperature at higher elevations... that's all I can think of... I'm so sorry that happened. ~~Granny
DeleteActually, Granny, water boils at a lower temp at higher elevations. We live at 4800 ft. and water boils here at 200 degrees.
DeleteYou both have a point. Water boils, starts bubbling and rolling, at a lower temperature at higher elevations, but it does not reach 212df as easily. Gas heat in particular takes longer to allow water to reach 212df. Some campers are surprised to find that they can not cook pasta dishes as quickly as they did at low elevation. Alcohol and propane stoves take a long time to heat or cook items like pasta and beans. Cooking beans at elevation without a pressure cooker can take many hours even days (depending on how dry the beans were at the beginning). I have lived over a mile high most of my life, and often camped at 9 to 10 thousand feet. Raised items, breads and cakes, can bloom well beyond your expectations and still be raw. There is less air pressure, moisture escapes faster, and temperature reacts differently. Chefs recommend dropping oven temperatures by about 10 degrees per thousand feet,and lengthening cooking times to balance moisture loss, air pressure and temperatures.
DeleteAWESOOOOOOMMMEEEE!!! I was thinking about this just today while thinking about making franks and beans and canning them. Being a Boston MA native I thought it would be great to do this. Also thought about doing it with zucchini bread. Thanks Granny!
ReplyDeleteYou mention your canner and not tightening the lid, is this essentially a water bath method? In the comment above you mentioned pressure canning (re: altitude) so now I'm confused...
ReplyDeleteYes, this is essentially a water bath canning method... the comment above was a discussion on pressure canning and water bath canning and various altitudes and adjustments for them. ~~Granny
Deletelets say i want to can bread that already made ie muffins, cakes. And use the pressure method like you would with meats. would that help keep the risks of bacteria growth low?
ReplyDeleteHmmm... would definitely reduce the risk, but it might overcook the cake... might collapse the leavening... I don't know... if you try it, let me know, I'd like to know too! ~~Granny
DeleteHave you tried it in the oven without steam? The canned cakes usually are quite moist and I think it should can up The same as quick bread.
ReplyDeleteI've tried other cakes and quick breads in the oven without steam with good results... Boston Brown Bread is traditionally a steamed bread so I went with tradition on this one. ~~Granny
DeleteI made this last night and tried it this morning and it's about the best brown bread I've ever had. I'm the only one in the house that likes it, so I used half pint jars and steamed for two hours. Wonderful and so easy! The original recipe amounts (with the raisins) made up exactly enough for five half pints, and the half pint jars are the ideal size for one person. Considering the warnings, I'll refrigerate or freeze them, because they are very moist.
ReplyDeleteThis was my very first time canning anything. I just can't stop looking at these perfect little jars of brown bread. Thank you so much for this.
Yay for you Mariana!!!! ~~Granny
DeleteI am not able to view this web site correctly on firefox I believe there
ReplyDeleteis a downside
my site ... how to increase chances of getting pregnant
I wish this was an approved recipe... but I'm not taking any chances on botulism... It is unsmellable like you said and I sure wouldn't want to kill anyone... It sounds really good.. I might make some to just keep in the frige..
ReplyDeletecan I use quart jars ? you didn't give a time for them I added 15 min....
ReplyDeleteI am making this today for the first time,doubled the recipe added 1tsp instant coffee to give it some bite(I read coffee was used in brown bread when molasses wasn't available,wow) used 4 pint wide mouths,I filled to half way to avoid over flow of lids.
ReplyDeleteThis is a good recipe for me cause I can't bake loaf bread.
ReplyDeletesnaptube install
snaptube download app
snaptube online
snaptube free download
Considering that SnapTube can download videos so that users can watch them while offline.
I weigh my ingredient and your recipe calls for heaping cups so I'm at a loss!! Please help granny😆
ReplyDelete