Sunday, June 29, 2014

Canning Blueberry Syrup

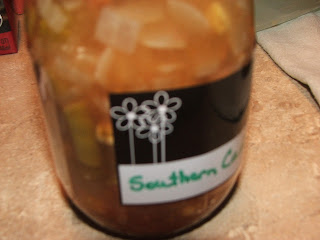
I ended up with 2 four-ounce jars, 7 eight-ounce jars, and one 12-ounce jar
of blueberry syrup... plus a bit left over.

Our blueberries have been ripening over the past couple of weeks... but this week they've stepped it up a notch and I'm picking every couple of days. Mr. G has had a hankering for blueberry syrup over pancakes like they used to have at the original IHOP... back in our younger days.

So, I made him up a batch of blueberry syrup!

Since I failed to take photos of my process due to the fact that I decided to make this delicious syrup in the middle of the night... and since I followed exactly the recipe on the PickYourOwn website... I'm just going to link below to that site so you can follow their most excellent tutorial on canning your own blueberry (or any berry!) syrup. It's BERRY delicious!

Sunday, May 4, 2014

Wild Honeysuckle Syrup


When I was growing up, honeysuckle blooms were so much fun... they meant summertime to us! They smelled so very sweet and we'd pick them and ever so slowly and carefully pull the stamens out and suck off the drop of tasty nectar from each one. Sweet and sticky and yummy!


My parents were always trying to get rid of honeysuckle... I never understood this as a child... it was so pretty and smelled so good... and gave us a delicious summertime snack! But, as we found out, honeysuckle is prolific... invasive really. So Daddy chopped it down, pulled it up, anything he could do to rid our yard of this invasive vine. At my grandmother's house, there was always a huge honeysuckle vine growing just outside... and up the side wall of the outhouse... made visiting that smelly place much sweeter!


When Mr. G and I moved back to the country a few years ago, we found we had honeysuckle growing near our front deck... being hardened against it as a child, I immediately began pulling it up to rid our yard of its invasive nature... Mr. G liked the stuff! He begged me to keep it! So we kept one small vine, with my warning to him that it would take over the porch... it has! But it smells so lovely this time of year... takes me back to barefoot, lazy, summer days with my siblings and cousins wandering the woods in the heat of summer, wading the creek and "falling in" to cool off... climbing trees, making "playhouses" underneath the pine trees with moss for our carpets and beds, and picking honeysuckle blossoms to suck the sweet nectar from them.

Since we now have a massive honeysuckle vine attached to our front deck and it showers us with its delicate, sweet-smelling blossoms several times each summer, I decided that SURELY honeysuckle has some usefulness... so I began scouring the internet and books to find out.

Guess what? Honeysuckle is indeed a useful, beneficial plant!

According to WebMD, honeysuckle (or as it is sometimes called, woodbine) "is used for digestive disorders including pain and swelling (inflammation) of the small intestine (enteritis) and dysentery; upper respiratory tract infections including colds, influenza, swine flu, and pneumonia; other viral and bacterial infections; swelling of the brain (encephalitis); fever; boils; and sores. Honeysuckle is also used for urinary disorders; headache, diabetes, rheumatoid arthritis, and cancer. Some people use it to promote sweating, as a laxative, to counteract poisoning, and for birth control. It is sometimes applied to the skin to reduce itching and inflammation."

From BellaVista Farm... honeysuckle medicinal benefits:
  • clears toxins
  • kills or inhibits germs
  • coughs and asthma
  • natural antibiotic used for staph or strep
  • reduces fever and heat in the body
  • for reducing ulcers, sore throats
  • clears congestion
  • used for acute symptoms NOT chronic symptoms
  • reduces rashes from poison oak
  • cuts that have become infected
  • tea used as an eye wash
  • headaches
  • helps nausea and vomiting from Hepatitis C
After finding all the medicinal benefits in honeysuckle, a plant I once thought of as a pest, a weed, something to destroy... I set about looking for recipes.
A favorite of ours is Wild Honeysuckle Syrup... it's delicious as a sweetener for tea and soothes a cough and congestion when you have a cold or the flu...
Here's how I make it...
First I pick honeysuckle blossoms when they're full and sweet smelling... if a few leaves get mixed up in them, no problem, they're good too, just not as sweet as the flowers (just no berries, they're toxic).

2 cups of honeysuckle blossoms
4 cups water
1 cup honey
In a saucepan over high heat, bring the water to a boil, stir in the honey suckle and reduce heat, simmering for 10 minutes. Turn off heat and strain. Return to warm pot and stir in the honey until it is dissolved.


Now... once you've done this, you can...
1. Store your syrup in a lidded jar in the fridge for up to a month.
2. Freeze it in ice cube trays, then store the cubes in a plastic bag in the freezer for up to 6 months.
or
3. (which is what I do because I make more than 2 cups worth of blossoms at a time) Can it!

I heat my pint (or half pint) canning jars to boiling to sterilize them and I keep them HOT... then I simmer my lids and rings and keep them hot. Once I dissolve the honey into the warm honeysuckle "tea" I then ladle the mixture into my hot canning jars, twist on the hot lids and set them on a folded dishtowel on the counter to cool and seal.

This is the only recipe I make that I DO NOT process in a boiling water bath or pressure canner... and here's why I don't...
There is a large amount of honey in this recipe... honey is a natural preservative and never goes bad.
Boiling the mixture, in my opinion, would kill the benefits of the honey in the syrup, I just heat it up gently.
If your jars and your lids are HOT and the liquid is hot, the jars will seal as they cool on the counter.
If it would make you feel better, and "safer" to do so, you could process the jars in a boiling water bath for 10 minutes. I prefer not to so I keep all the benefits of the honey as well as the honeysuckle.

To use this mixture for a cold or cough, take 1 ounce every 4-6 hours. Do not give to infants or children under 2 years of age.
Now, just so you know, I am not a medical professional, so must add a necessary disclaimer to using this recipe as a remedy... we use it for coughs and colds, but use it yourself at your own risk. Thanks.

Thursday, December 5, 2013

Canning Turkey Bone Broth


I almost didn't write this blog post... ONE... I didn't remember to take very many pictures of the process... and TWO... it's so easy, I wasn't sure anyone would benefit from it... but, then, I thought maybe someone, who has never attempted to do anything with a leftover Thanksgiving turkey carcass, would indeed have a thing or two to learn.

After Thanksgiving dinner, after we had eaten our fill of turkey and all the trimmings, and after my out of town family had made themselves to-go plates to take home (at my request!)... I was left with a naked carcass... mostly just the bones... with small bits of meat here and there. I had also purchased, while they were on sale, a second turkey, which I split in half down the middle and smoked in our electric smoker (major YUMMINESS!)

I decided to make turkey bone broth from the remainders of our delicious Thanksgiving feast.

I got out my huge stockpot and put the bird carcass inside... I chopped up 4 or 5 stalks of celery (I like to include the leaves, they're so flavorful), a couple of onions (peelings and all)... I would have included a few carrots but I didn't have any and was NOT going to the store on Black Friday! I added some salt,  and other spices (garlic powder, peppercorns, a couple bay leaves... thyme would have been good, but I didn't think of it, wish I had! And parsley! Parsley would be good too!) That's how brainless turkey stock is... you just throw in a bunch of yummy stuff!

I added water to the stockpot, covering all the ingredients inside completely... I heated the mixture to boiling, then lowered the heat and let it simmer on low for several hours (I think I simmered for 6-8 hours... longer would be fine), I also added just a little splash of apple cider vinegar to help draw out the flavor from the bone marrow (doesn't give it a vinegar flavor, I promise!)

After all that simmering, a rich broth began to surround all the bones, meat, skin, and veggies. Smelling GOOD!

I strained the veggies out through a colander to get the big pieces, then again through cheesecloth to get all the small bits.
After the strained out carcass and veggies cooled, I picked all the little bits of meat left behind... and had a turkey sandwich!

I left the broth to cool overnight (refrigeration would be best, but my fridge was still mighty full!)... if you don't like turkey fat in your broth, refrigerating will solidify (sort of) the fat and it will float to the top so it can be skimmed off. I personally like a little fat in my broth, so I didn't skim mine very much.

I fed the scraps to my chickens... they thought it a delightful treat! (I've heard tell that some folks grind up the bones afterwards to make bone meal to add to their gardens... this time I was not THAT industrious!)

I brought the rich broth back up to a boil and began filling my hot, sterilized quart canning jars, leaving about an inch headspace. I tightened on my hot, sterilized lids, to fingertip tightness.

I processed the quarts of broth in my pressure canner at 10-11 pounds pressure for 25 minutes (pints would be 20 minutes).

After processing, I let the pressure in my canner drop back down to ZERO slowly and naturally (didn't want any liquid loss, aka siphoning, by force cooling the canner).

I removed the jars from the canner using my jar lifter and set them on a folded dish towel to cool and to listen for the PING of each successfully sealed jar... LOVE the PING!

From two turkey carcasses, I ended up with 14 quarts of rich, yummy broth,
PLUS enough to add to the smoked turkey I canned the next day!


Sunday, August 4, 2013

Jar Labels... A Review


Awhile back the great folks at www.pantryparatus.com sent me a sample package of their Modern Harvest home canning labels for me to try...

I set them aside and, well, honestly... forgot I had them.

Came across them recently and decided to give them a try... and am I glad I did!

I received the flower design labels which included 12 each of quart, pint, and half pint sizes... they can be found here. PantryParatus also offers several other styles of labels... (head on over there and check them out!)

So, basically here's what you do with these great labels...

Can your food like normal and let the jars cool...

Then...
Heat a pot of water to boiling (or, like I did... if your hot water bath water is still hot, just use it)

Choose the size label you need (I used the pint size) and with a Sharpie (black would probably be better, I couldn't find black) write the jar contents on the label...


on the flip side of the label you can check off the month and year... and there's even a space to fill in later when you open the jar...


Slip the label from the top or bottom of the jar towards the center and just adjust it until it sits where you want it... it'll fit loosely...


Now here's the fun part... the magic!!!!

Pick your jar up using your jar holder (canning tongs) and carefully dip the jar(s) into the hot water...


The label will immediately shrink to fit the jar (unless the water isn't hot enough... if that's the case, heat the water back up and try again)


Like magic! Like Shrinky Dinks! Like Shrink Wrap!!!


After you're done with the jar of goodies, just carefully slide a knife under the label and twist to break the label loose... no more gummy glue, sticky residue... and they're cute enough for gift giving!
I love them!!!

Thank you PantryParatus!

www.pantryparatus.com

Thursday, July 4, 2013

A 50s Housewife Shower


 I wanted to throw my daughter a shower but wanted something a little different... and fun. Knowing other friends and family had plans for traditional household, lingerie, and other showers... I came up with a 50s Housewife Shower... the gift requests would be kitchen gadgets, dish towels, aprons, etc. and an old fashioned "Pounding" (to help stock the newlyweds pantry with non-perishable foods, paper products, etc.)

The planning began... I made the above invitation... and settled on a turquoise and red color scheme. In each invitation, I enclosed a blank recipe card and directions to my house... I got a recipe box to have for each guest to put their recipe for an added gift for my daughter, Hannah.

I found an entire 1955 Sears catalog online in pdf format and printed out 8x10 pictures of some of the ads to frame as decorations for the party... and conversation pieces. I also found photos and prices of grocery items, houses, cars, etc. in the 1950s and framed those. Found pictures of 1950s sitcom couples to frame as well.

I made the photo below (using PhotoShop) to go with a vase of flowers for a table centerpiece...


For the menu I wanted typical 1950s food... I chose...

Jello Mold with Fruit Cocktail
Cupcakes
Meatloaf "Cupcakes" with Mashed Potato "Frosting"
Pigs in a Blanket
Deviled Eggs
Cheese Ball and Crackers (recipe)
Butter mints and mixed nuts
Frosted Sandwich Loaf (I used a variation of this recipe)
Pimento Cheese, Egg Salad, and Chicken Salad (served on homemade yeast rolls and croissants)
Tuna Noodle Casserole
Veggie Tray with Dips (I made Confetti Dip and Sharp Cheddar, Olive, and Pepper Dip)
Fruit Tray with Dip (I made a simple 1950s fruit dip, mixing 8 ounces marshmallow cream with 2 Tbsp. frozen orange juice concentrate, thawed)

The food table
While looking for a way to construct myself a cute 1950s hat to wear, I found several sites showing how to make "fascinator" hats... I decided to make one for myself, my daughter and my daughter-in-law... it became an addiction and I ended up making 24 little hats... I had enough for all the party guests!


The day for the shower arrived...

On my back porch I filled a huge galvanized steel washtub with ice and retro-sodas in glass bottles I found at World Market (vanilla ice cream was on hand for ice cream sodas as well)


We (I had a LOT of help from my sister, Beth, and my daughter-in-law, Kaila) made iced tea and lemonade and put the makings for Mimosas on ice.


We put on our best 50s duds and waited on our guests to arrive...

My sister, Beth, and me in our 50s attire
As each guest arrived, Kaila had them bend over without bending their knees, and trace their hand on a piece of paper... while I secretly wrote down their comments as they struggled to complete this task... later on we read the comments out loud as "Things that were said on the guest's wedding night, or things they recommended to be said on Hannah and Nick's wedding night"... this activity proved to be hilarious... A few comments that were recorded included:

"I don't think I can do this, make Mama do it!"
"Can you bring it up a little... Ouch! Ouch! Ouch!"
"Is that the only way to do it or is there a clever way?"
"This is hard, I can't do this, I'm not that limber!"
"My back will not allow that!"
"If I mess up, can I do it again?"
"Are you sure?"

We directed the guests to the "powder room" all decorated with the fascinator hats and had them pick out and don a hat of their choice.

Fun times!

We ate... and drank... We have music channels on our satellite television so we turned it to "Malt Shop Favorites" and had 50s music playing in the background... there was a lot of impromptu dancing... how can you NOT dance to "C'mon Baby, Let's Do the Twist?!?"


We played old fashioned 1950s shower games...

"Plant a Kiss on Elvis" (like Pin the Tail on the Donkey
But with red lipstick and an Elvis poster

Sniff a Spice game...

Common household spices were placed in bags and tied loosely
with ribbon so you could smell them but not see them.

A relay race putting on stockings while wearing oven mitts...

We had three teams... Team 1 were the winners!

Game prizes included homemade aprons... super cute (but I forgot to take a picture of any of them!)

We took the "Are You Ready to be a 50s Housewife" quiz and the "Are You a Good 50s Houswife?" quiz... these evoked laughter as well as groans of disbelief!

I made Hannah a corsage made from measuring spoons, a mini-whisk, and an adorable mini food grater (I found at World Market)


We played the Clothes Pin Game... (everyone was given a clothes pin and instructions not to say the words "wedding" or "marriage"... if you heard someone say one of the "no-no" words, you could take their clothes pin... person with the most clothes pins at the end of the party won a prize.


My niece Cassie in her poodle skirt

Hannah looking all cute and stuff

Lovely ladies in their fascinators

Precious daughter-in-law who was my right hand!

Paige in all her cuteness!

Opening gifts

My sister Beth and cousin Jenny in their 50s finery


Fun times!

That fish is NOT on Sara's hat!

The "Aunts" enjoying the day... too fun!

Hannah and Me!


Sweet, beautiful Kaila

My sister and me hamming it up for the camera

Great day, good food, fun times... LOTS of laughs... and Hannah got a LOAD of useful, thoughtful, creative, and great gifts.


Thursday, June 27, 2013

Canning Lamb


 Just after the Easter/Passover season I bought a nice-sized leg of lamb... regular price $60 plus... for $18! I brought it home and put in the freezer... it was probably 8-10 lbs. and there are only the two of us... thought I'd save it for company... or can it.

Now with this shower for my daughter coming up and berries coming in and needing the freezer space... I pulled it out the other day and thawed it...

I decided to cook it in our smoker... I salted and peppered it... added a variety of herbs (rosemary, mint, thyme, oregano, basil) to my smoker's water pan... set the temp to 250 and the time to 8 hours and let 'er smoke... adding chips (I used Jack Daniels whiskey barrel chips) every hour or two.

Due to our schedules and such, we weren't gonna get all that lamb eaten any time soon so I canned it...

First, I removed all the meat from the bone and cut it into stew sized chunks, taking care to remove any excess fat and gristly pieces.

Then I boiled my wide-mouth pint jars and put my lids on to simmer.


 I packed the jars pretty loosely with the chunks of lamb, leaving a good inch or more headspace.


I added a half teaspoon of canning salt to each pint jar (optional of course!)


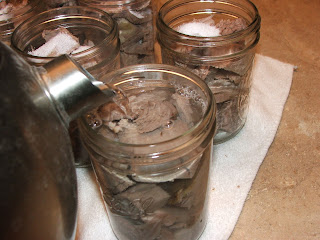
Then I filled the jars with boiling water, leaving an inch headspace.


 I removed any air bubbles using a plastic chopstick and adjusted the liquid if necessary.


I wiped the jar rims with a damp cloth and tightened my lids on to fingertip tightness (no tighter or you can end up with buckling lids!)

I then processed the jars in my pressure canner at 10 lbs. pressure for 75 minutes (quarts would process for 90 minutes).

After the processing time, (I gotta be honest here!) it was time to leave for work so I turned the stove off and left the canner to cool naturally while I was gone for the day.

When I got back home, I removed the jars from the canner and set them on a folded dish towel on the counter... they'd already cooled AND PINGED!!! while I was gone so I missed the music! But they all sealed!

I ended up with 7 pints of lamb chunks... lamb stew this winter??? I think so!

And now I have this lovely meaty lamb bone left... I'm thinking I'll try making a little lamb broth outta that.


html, body, div, span, applet, object, iframe, h1, h2, h3, h4, h5, h6, p, blockquote, pre, a, abbr, acronym, address, big, cite, code, del, dfn, em, font, img, ins, kbd, q, s, samp, small, strike, strong, sub, sup, tt, var, b, u, i, center, dl, dt, dd, ol, ul, li, fieldset, form, label, legend, table, caption, tbody, tfoot, thead, tr, th, td { margin: 0; padding: 0; border: 0; outline: 0; font-size: 100%; vertical-align: baseline; background: transparent; } body { line-height: 1; } ol, ul { list-style: none; } blockquote, q { quotes: none; } /* remember to define focus styles! */ :focus { outline: 0; } /* remember to highlight inserts somehow! */ ins { text-decoration: none; } del { text-decoration: line-through; } /* tables still need 'cellspacing="0"' in the markup */ table { border-collapse: collapse; border-spacing: 0; }