Sunday, November 18, 2012

Canning Ground Beef in Broth


Having jars of canned ground beef can be very handy on a busy day... or if you forgot to thaw out anything for dinner...

Open a jar, add to spaghetti sauce, season for tacos, add some beans and spices for a quick pot of chili, make a brown gravy, add spices and top with mashed potatoes for Shepherd's pie... the possibilities are endless...

Here's how I canned ground beef in broth...

I canned my ground beef in pint jars... rule of thumb one pint=one pound (more or less)... so pints are a good size for when your recipe starts out with "brown one pound of ground beef..."

I buy ground beef whenever I find it on sale... or it would be great if you raise (or buy) your own beef and don't have the freezer space to store it.

I started out by browning my ground beef...


I then drained the meat...
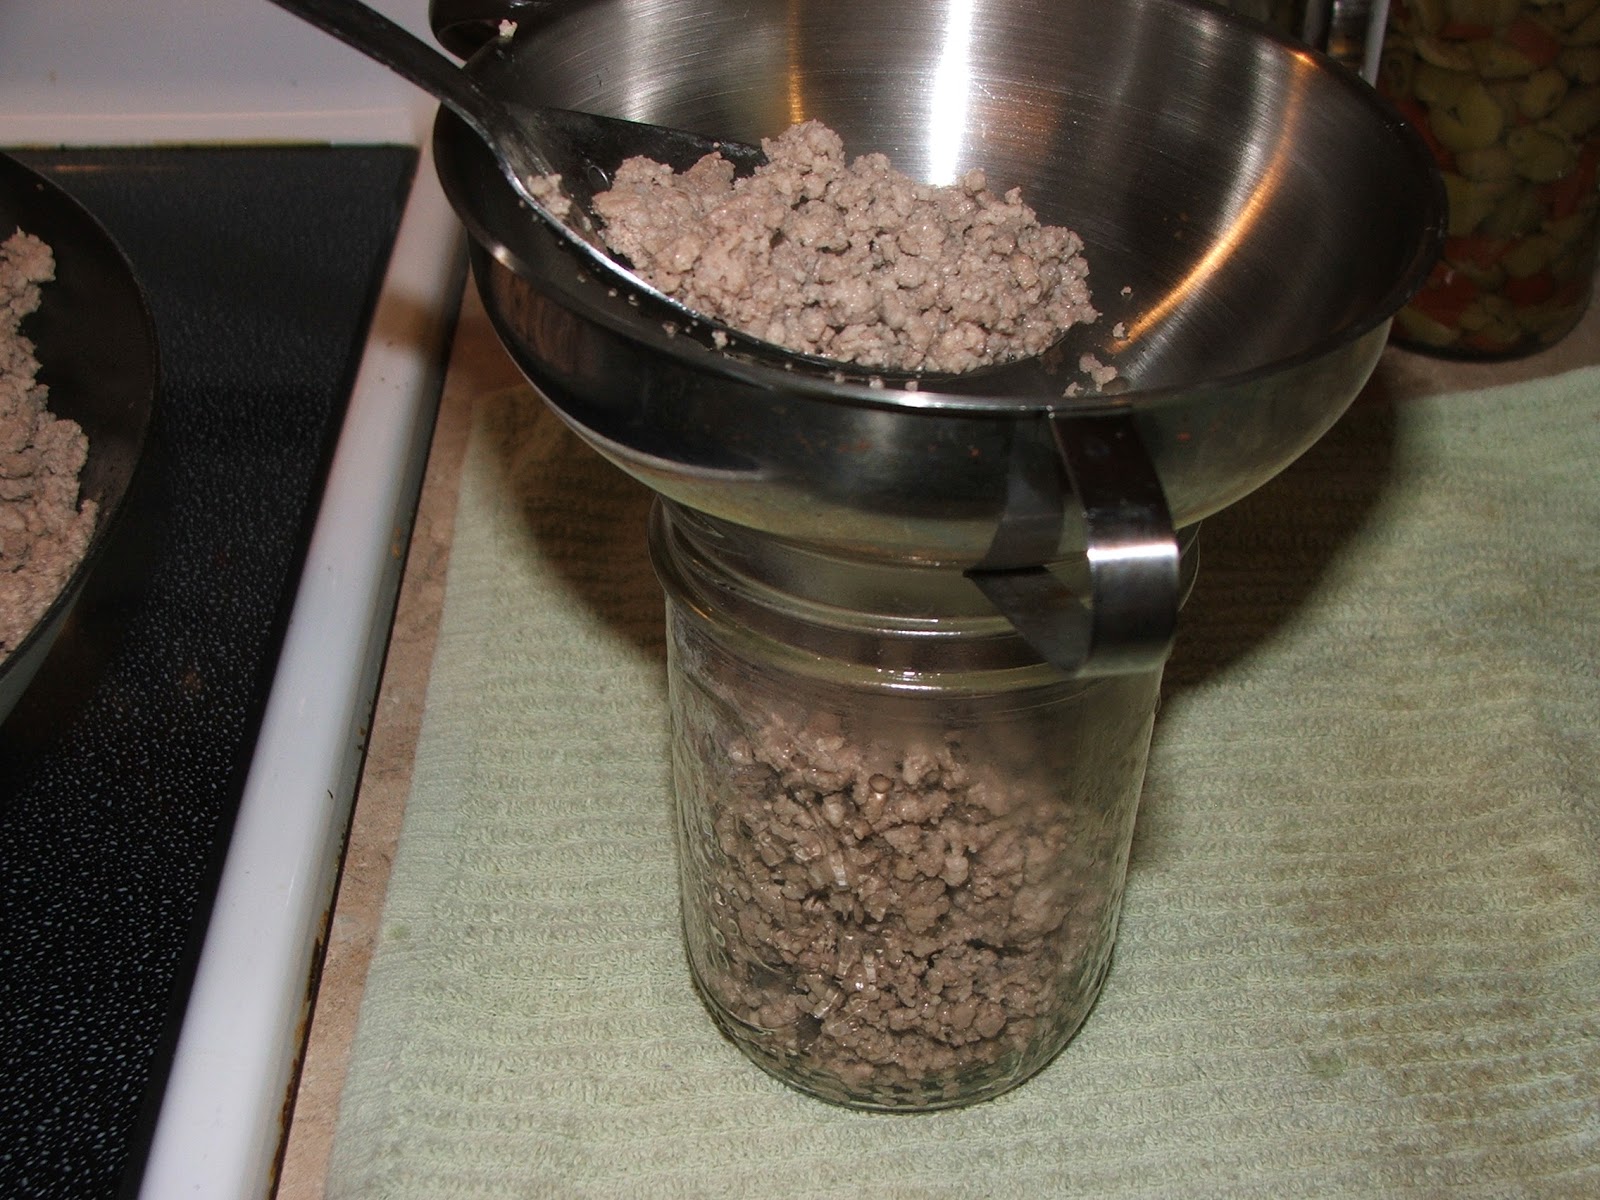

...and filled the hot, sterilized pint jars loosely, leaving a generous one inch headspace.


Next, I filled the jars with hot beef broth (make your own, buy it from the store, or use beef broth granules and mix with boiling water)... I left a one inch headspace... got rid of any air bubbles by inserting a plastic knife between the inside of the jar and the meat, adjusting headspace as necessary by adding more broth if needed.

After wiping the jar rims with a cloth dampened with a little vinegar to cut any greasiness, I tightened my hot, sterilized lids on to fingertip tightness.

I processed the pint jars in my pressure canner at 10-11 pounds pressure for 75 minutes (quarts would be processed for 90 minutes).

After processing, I let the pressure drop in my canner slowly, on its own... then waited an additional 10 minutes or so (the slow "cool down" helps prevent liquid loss and jar breakage) then removed the jars using my jar lifter...

And set them on a folded dish towel on the counter to cool (away from any drafts) and to listen for the PING! of each successfully sealed jar.


Homemade convenience food... doesn't get any better!

Friday, November 9, 2012

Let's Write a Book


A few weeks ago I received an email from a dear lady, Ruth, who works for a small publishing company, asking if I was interested in publishing a "Canning Granny" Cookbook. I put out a small "feeler" question on Facebook to see what you folks thought... would you buy it? what would you like to see in it? etc.

Combining your wonderful feedback, my own ideas, and Ruth's suggestions... here's what we've come up with... it's still an idea... nothing's been signed... yet.

Reader's ideas and suggestions...

• Full color, step by step... like the blog
• Not too expensive
• Something different, not just a re-hash of the Ball Book and other canning books
• E-book as well as hard copy
• Recipes submitted by readers and Facebook followers with the contributor's name and state listed with the recipe (LOVE this idea!)


So, here's the concept...

I'd like to publish a Canning Granny (and friends!) Cookbook including recipes submitted by readers as well as my own recipes...

There are TONS of canning books out there with jams and jellies, pickles, fruits and veggies... so, trying NOT to just be a re-hash of those...

This book will be "Meals in Jars"... recipes for canning meals that are full meals or would only need making rice or noodles or adding milk or cream to the product after opening... for busy days when you don't have time or feel like cooking a full meal... just open a jar, boil some noodles, and eat! Or for times (like the recent Hurricane Sandy) when you have limited means of cooking and need something tasty and nutritious that you can heat up fast and have a meal in minutes.

I plan to include in the book... basic canning processes briefly... maybe include frequent or unusual questions and answers... and a few anecdotes about me and my life scattered here and there, just for fun.

Whatcha think?

So... if you're interested in participating in this cookbook project, here's what I'd like for you to do...

Send me, via email, at canninggranny@gmail.com...

Your "Meal in a Jar" recipe(s), including your Name and the State you are from...

The recipes need to be your own creation (or a friend or family member's), so we don't copy recipes from other cookbooks... we want these recipes to be unique.

The recipes need to be "canning safe!" While I sometimes indulge in "outlaw canning," this collection will need to be "approved." No grains, no "unapproved" thickeners, no dairy, no noodles... nothing "questionable."

Ideas include soups, stews, casseroles, bean dishes, meat and chicken dishes...

Please include complete instructions as well as how much it makes (quarts, pints, etc.)

So... whatcha think?
Interested?

I think this will be fun (even though right now I feel just a little overwhelmed by the idea! YIKES!)

Again... my email address is canninggranny@gmail.com

Let's get started!


Sunday, November 4, 2012

Canning Mexican Chicken Soup


Mr. G always takes me to get Mexican Chicken Soup at the local Mexican Restaurant whenever I have a bad cold... it's such a comfort food. When reader Diana shared this soup with us on Facebook, my ears perked up... sure would be nice to have some of this delicious goodness on hand for those chilly days and winter colds.

The recipe is a little different than our local restaurant serves, but it's so yummy! The restaurant includes rice and doesn't have beans... and they add avocado and lime juice... When I opened a jar of this soup recently, I added some sliced avocado and a squeeze of lime... it's pretty close!

Here's what I did...

I cooked, de-boned, and shredded three chicken breasts (boneless, skinless would save a step here)

Then in my large stainless steel stockpot I combined the shredded chicken with

1-1/2 cups sliced carrots


2 cups sliced celery


2 cans Ro-Tel (tomatoes with peppers)


2 cans kidney beans (if you prefer dry, soak some overnight before adding)


4 cups peeled, chopped tomatoes
6 cups water
3 cups whole kernel corn (I used frozen, fresh or drained canned would work)


1 tsp. cumin


1 Tbsp. canning salt
3 cloves minced garlic
3 bouillon cubes

I brought the mixture to a boil over medium high heat, reduced the heat and simmered for 5-10 minutes.

Meanwhile... I washed and sterilized 7 quart canning jars and put my lids in hot water to simmer.

I ladled the hot soup into the hot jars leaving an inch headspace, wiped the jar rims with a damp cloth, and tightened on my hot lids to fingertip tightness.

I processed the jars of soup in my pressure canner at 10 pounds pressure for 90 minutes (if you choose to do them in pints, process for 75 minutes)

After processing, I allowed the pressure in my canner to drop to zero on its own (don't hurry it or you might get liquid loss)... then opened it up and removed the jars using my jar lifter and set them on a folded dish towel on the counter to cool... and to listen for the PING of each successfully sealed jar!


Come on winter! We're ready!

For a printable copy of this recipe click here.

Thursday, November 1, 2012

Canning Sweet and Sour Chicken


When one of Canning Granny readers, Diana, shared the recipe for Sweet and Sour Chicken, I knew I had to try it...

Here's what I did...

I sterilized 5 quart canning jars.

I cooked and shredded 4-1/2 pounds of chicken breast

Drained 3-15 ounce cans of pineapple chunks, reserving the juice

Diced 2 green bell peppers, 1 red bell pepper, and 2 medium onions

I layered in the jars... chicken, onions, peppers, and pineapple chunks.


In my large stainless steel saucepan, I combined...

3 cups reserved pineapple juice
3/4 cup brown sugar
1-1/4 cups white vinegar
6 Tbsp. soy sauce
4 Tbsp. ketchup
1 tsp. ginger

I brought this mixture to a boil over medium high heat, stirring to dissolve the sugar.

Then poured the hot liquid into the jars, covering the layered ingredients, leaving a one inch headspace. I removed any air bubbles and adjusted the liquid as necessary.


I wiped the jar rims with a damp cloth, then tightened on my hot lids to fingertip tightness.


I processed the jars in my pressure canner at 10 pounds of pressure for 90 minutes. After processing, I allowed the pressure in my pressure canner to drop to zero naturally, then opened it and removed the jars using my jar lifter. I set the hot jars on a folded dish towel on the counter to cool... and to listen for the PING of each successfully sealed jar.


Several weeks after canning this "meal in a jar," I opened a jar for dinner, made a pot of rice and served it over the rice... SO YUMMY! Mr. G said it was Chinese Restaurant GOOD!

For a printable copy of this recipe, click here.

Saturday, October 27, 2012

Canning Stress-Free French Onion Soup


What could be better than a rich, hot bowl of French Onion Soup on a chilly winter evening...

Here's how I made a batch to have on hand...

I sauteed...

7 medium onions, sliced

in...

2 Tbsp. butter

until softened and caramelized.

I divided the sauteed onions evenly among 5 quart canning jars I had previously washed well and sterilized by boiling in water.


For the soup part...

In my large stainless steel saucepan, I mixed together...

12 cups beef broth (your own, homemade broth... or storebought will do)
3/4 tsp. garlic powder
2 tsp. steak sauce (any kind)
2 tsp. salt (I used canning salt)

Bring the mixture to a boil, stirring occasionally.


I ladled the hot broth over the sauteed onions in the quart jars, leaving a one inch headspace.


Using a damp cloth, I wiped the jar rims and added my hot lids and rings, tightening on to fingertip tightness.

I then processed the jars of soup in my pressure canner at 10 pounds pressure for 75 minutes.

After processing, I allowed the pressure in the canner to drop to zero on its own... then opened it up and removed the jars using my jar lifter, setting the hot jars of soup on a folded dish towel on the counter to cool and to listen for the PING! of each successfully sealed jar.


All we need to do when we want French Onion Soup for dinner, is open a jar, heat it up... add a baguette or some croutons and some good mozzarella and Yumminess in a jar!

Not only is making delicious meals such as this french onion soup and canning food exciting and a great hobby it's also something that makes for an excellent source of stress relief. I would suggest it to anyone who likes to cook, needs a good hobby and has some free time!

For a printable copy of this recipe, click here.

Monday, October 22, 2012

Canning Sweet Potatoes

Left, Sweet Potatoes in brown sugar syrup. Right, in water.
Sweet potatoes are in season... we didn't grow any this year and I've been meaning to take a trip to the farmers market to get some for weeks now... but life gets in the way... and I get lazy... and it's 45 minutes on the other side of town to the market in an area we just don't frequent unless we specifically plan to go... and I get lazy...

This weekend, Mr. G and I were out running errands... Lowe's, grocery shopping, JoAnn's... he received a call from a fellow he'd been talking to about buying some new toy he wanted... the guy wanted to meet in Dixianna... AHA!!!! same road as the farmers market... sure, let's go to Dixianna! And we can swing by the market and see if they still have sweet potatoes... and we did... and they did... and I bought 80 pounds of sweet potatoes! Yay!

Back home to can them...

Here's what I did...


First, I filled my ginormous stockpot with whole, unpeeled sweet potatoes and covered them with water... brought them to a boil and boiled for 10-15 minutes, just to make them easier to peel (raw sweet potatoes are a BEAR to peel!)... I drained them and let them cool until they were easy to handle without burning myself... then I peeled... and peeled... and peeled...


And cut them into chunks (they were still quite firm in the middle)...


I packed them into my hot, sterilized quart jars, leaving a generous half inch headspace.


In some of the jars I filled with boiling water, leaving a half inch headspace... I checked for air bubbles, released the ones I found using a plastic chopstick and adjusting the water as necessary.


And in some of the jars I decided to fill them with a simple brown sugar syrup... 2 parts water to 1 part brown sugar, brought to a boil to dissolve the sugar (example 6 cups water to 3 cups brown sugar).


I wiped the jar rims with a damp cloth, removing any potato bits and residue. Then I tightened on the hot, sterilized lids to fingertip tightness.

I processed the jars in my pressure canner at 10 pounds pressure for 90 minutes (pints would be processed for 65 minutes).

After processing, I let the pressure in the canner drop on its own, no hurrying it... didn't want any liquid loss (siphoning)... although a few jars DID lose a little liquid (and that's OK as long as I didn't lose more than half the liquid!)

I removed the jars from the canner using my jar lifter and set them on a folded dish towel on the counter to cool... and to listen for the PING! of each successfully sealed jar. LOVE the PING!

34 beautiful quarts of sweet potatoes! 14 with brown sugar
syrup, 20 in just water... LONG day of canning, but such a
feeling of success when they're done and they all seal!
So satisfying!

Sunday, October 14, 2012

Jar Label Give Away!


Linda, over at Once Upon Supplies has graciously offered to provide some beautiful custom canning jar labels to give away to one lucky canner! Check out all the lovely labels and other supplies she has to offer over on her site.

The give away includes 80 jar labels of the winner's choosing (max 4 different designs) - approx $32 in value. Eligible for U.S. customers only.


All YOU have to do is comment in the "comments" section below and you're entered!

We will choose a winner one week from today, October 21, 2012, using random.org and the winner will be asked to email us with their mailing information so Linda can get the labels out to them... Easy Peasy! And good luck!

Thursday, October 11, 2012

Canning Oranges in Cointreau


I needed AN orange for a recipe I was making, but when I was at the grocery store, I just couldn't see paying a dollar for ONE orange when I could get a whole bag of them for $5! So I bought the bag of oranges and used one in my recipe... I had like 13 left! What to do?

I dug through my recipes and found a yummy sounding recipe... Oranges in Cointreau... Why not?

Here's what I did...

First, I made a spice bag (using a coffee filter, you can also use the traditional cheesecloth) with...

10 whole cloves
5 cinnamon sticks, broken in half

I tied the spices up in my coffee filter using a twist tie.

In my large stainless steel saucepan, I combined...

3-1/2 cups sugar
2/3 cup water


Then I dropped in my spice bag...


 ... and brought this mixture to a boil over medium high heat, stirring to dissolve the sugar. I reduced the heat and boiled the mixture gently for 10 minutes, stirring occasionally, then removed and discarded the spice bag.

Meanwhile I trimmed, sliced, and seeded 9 navel oranges (about 1/8 inch slices) then I cut the slices in half (because these were pretty big oranges).


I added the oranges to the sugar/water mixture, along with


3/4 cup Cointreau (if you can't find Cointreau, Triple Sec, Grand Marnier, or other orange liqueur may be used)


1/2 cup dry white wine (I used Chardonnay)


 Over medium-low heat, I brought the mixture slowly back to a boil, occasionally stirring gently so as not to damage the orange slices. Once it came to a boil, I removed the pot from the heat.


 Using a slotted spoon, I carefully packed the hot orange slices loosely in layers, in my hot, sterilized pint jars (you could also use half pint jars) to within a generous half inch of the top of the jar.


 I then ladled hot syrup (from the orange mixture in the saucepan) into the jar to cover the orange slices, leaving a half inch headspace. I removed any air bubbles, wiped the jar rims with a damp cloth, and tightened my lids on to fingertip tightness.

I processed the jars in a boiling water bath, ensuring they were completely covered with water. I brought the water to a boil and processed the jars for 15 minutes.

After processing, I removed the jars from the canner using my jar lifter and set them on a folded dish towel on the counter to cool and to listen for the PING of each successfully sealed jar.

This delicious fruity concoction is wonderful spooned over ice cream or pound cake, or the orange slices can be used as an edible garnish and the leftover juice used to sweeten beverages... and let me tell you, the syrup is SO SO yummy... I had a little left over and just canned one jar of juice alone!


This recipe makes about eight 8-ounce jars. (I had a few extra oranges and canned in pints, so ended up with six pints plus one pint of just syrup)

For a printable copy of this recipe, click here.

Saturday, September 22, 2012

Celebration Give Away Time!


Canning Granny is growing... on Facebook, on the Blog, and as an Official Canbassador for the Washington State Fruit Commission... and we want to show our appreciation to you fantastic readers for your support.

1. Canning Granny on Facebook has reached and exceeded the 20,000 "Likes" and it's time for a give away!

2. We canned all that delicious fruit from the Washington State Fruit Commission and it's time for a give away!

3. The Canning Granny Blog has launched (and now worked all the kinks out of) a Forum for folks to share, chat, and discuss in a searchable format... and it's time for a give away!

It's a Triple Give Away Celebration!

Here's all you have to do to join in on the celebration and sign up to get a chance at the Triple Give Away!

First... go to the Canning Granny Blog (and if you're reading this, you're already here! ;-)

Next sign up for the Forum and Share a recipe with us... if you are hesitant or unsure of how to do this, I've tried to make it simple... Click on the "Forum" tab on the blogsite...


Next, click on "Register" (if you are already a registered member of the forum, you can skip this step and simply "Login") Once you are "Registered" or "Logged In"...


... Click on the SubForum "Sharing Recipes"...


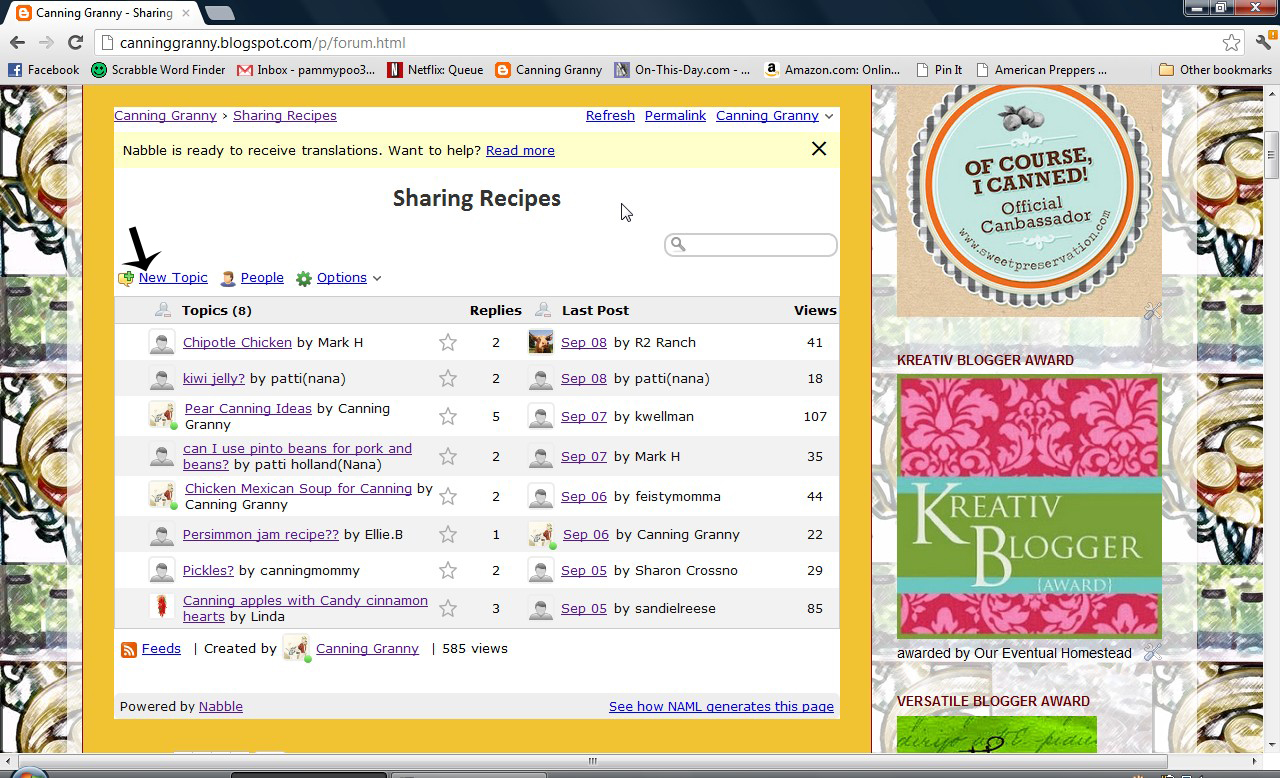
Then click "New Topic"...


...You will then see a "Post New Message" area... Put the title of your recipe in the "Subject" box and type your recipe in the "Message" box... then click "Post Message"... that's all there is to it! Submit as many recipes as you like...


As soon as I wake up and get moving on Saturday, September 29... I will select randomly from the recipes submitted and announce THREE winners. I'll announce on the Forum as well as on Facebook...

I will count the entries first... then enter the number of entries on random.org... then choose THREE numbers... and match the winning number(s) to the entries...

Oh, I guess you would like to know what the give away will be, huh?

In celebration of Washington State Fruit and Canning Granny's Canbassadorship (I'm SURE that's a real word!)... a Trio of Canned Fruit... Winner ONE will receive a half pint of Nutty Plum Conserve, Winner TWO will receive a pint of Spirited Peaches, AND Winner THREE will win a pint of Nectarine Chutney... A Triple Give Away for a Triple Celebration!

And a big "Cyber-Hug" Thank YOU from me!

Pictured (l-r) Nectarine Chutney, Nutty Plum Conserve, and Spirited Peaches

html, body, div, span, applet, object, iframe, h1, h2, h3, h4, h5, h6, p, blockquote, pre, a, abbr, acronym, address, big, cite, code, del, dfn, em, font, img, ins, kbd, q, s, samp, small, strike, strong, sub, sup, tt, var, b, u, i, center, dl, dt, dd, ol, ul, li, fieldset, form, label, legend, table, caption, tbody, tfoot, thead, tr, th, td { margin: 0; padding: 0; border: 0; outline: 0; font-size: 100%; vertical-align: baseline; background: transparent; } body { line-height: 1; } ol, ul { list-style: none; } blockquote, q { quotes: none; } /* remember to define focus styles! */ :focus { outline: 0; } /* remember to highlight inserts somehow! */ ins { text-decoration: none; } del { text-decoration: line-through; } /* tables still need 'cellspacing="0"' in the markup */ table { border-collapse: collapse; border-spacing: 0; }